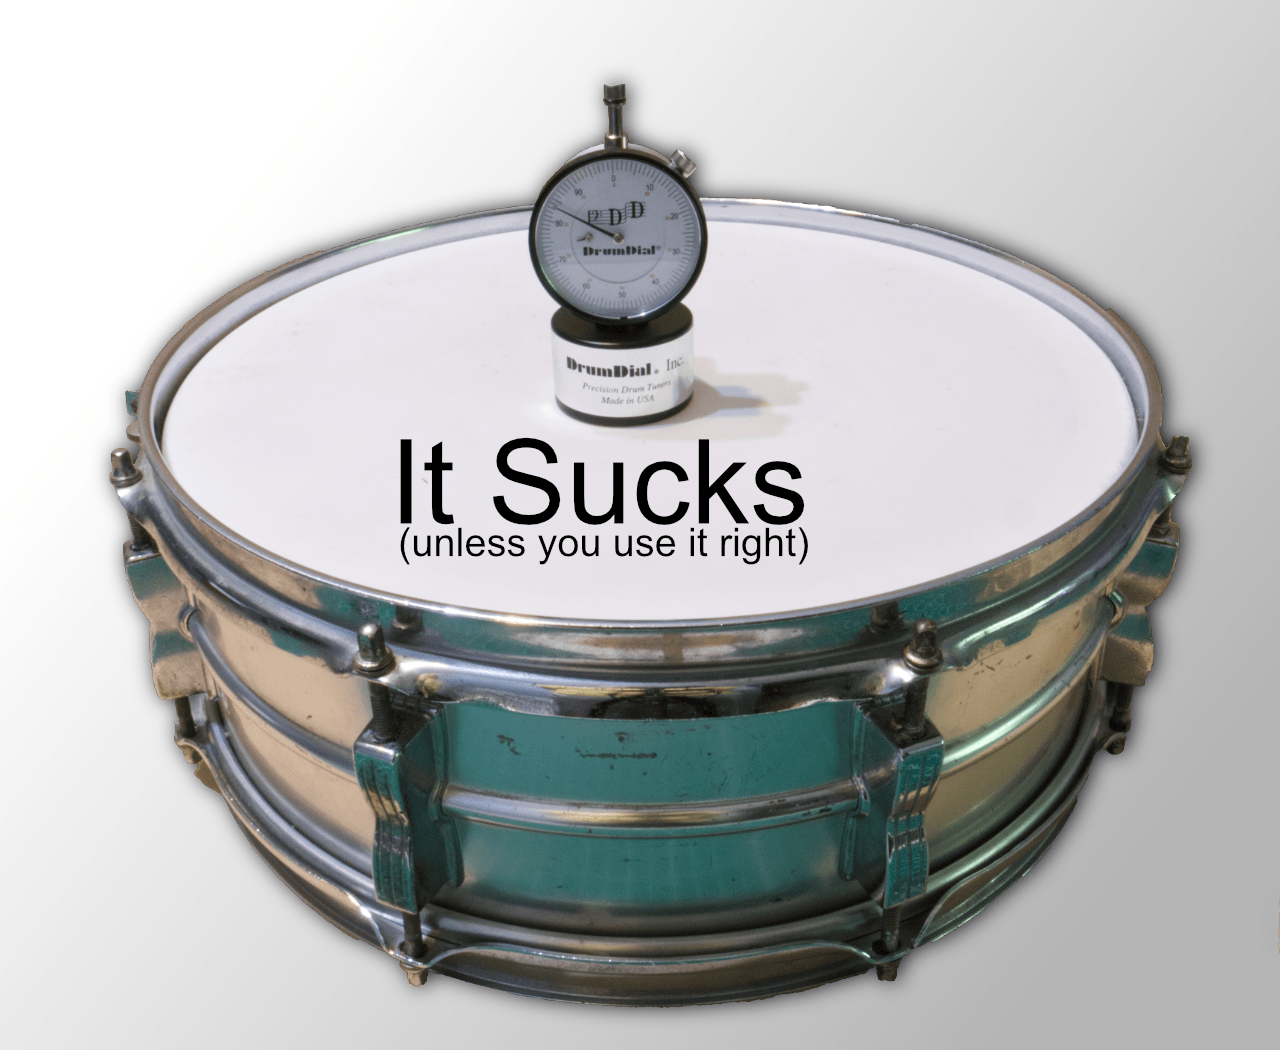
The Drum Dial is a “drum tuning tool”, or more accurately just a dial indicator on a base.
It’s one of the better devices for tuning drums, given that torque wrenches don’t work very well and tuners are an abysmal failure (which I’ve yet to cover).
The Drum Dial has some problems that get in the way of good results, and the official documentation does a poor job of discussing these issues. I’ve not seen any third-party attempts at covering these problems either.
So… Here I am. Allow me some of your time to better understand drum tuning in the context of using a Drum Dial.
Contents
Video
I’m going to try something new for a few articles and see how it goes. First I’ll post the text article, then follow it with a video the next week.
Both pieces of content will cover the same subject from different angles to maintain value to regular readers.
Problems
Hoops Part 1
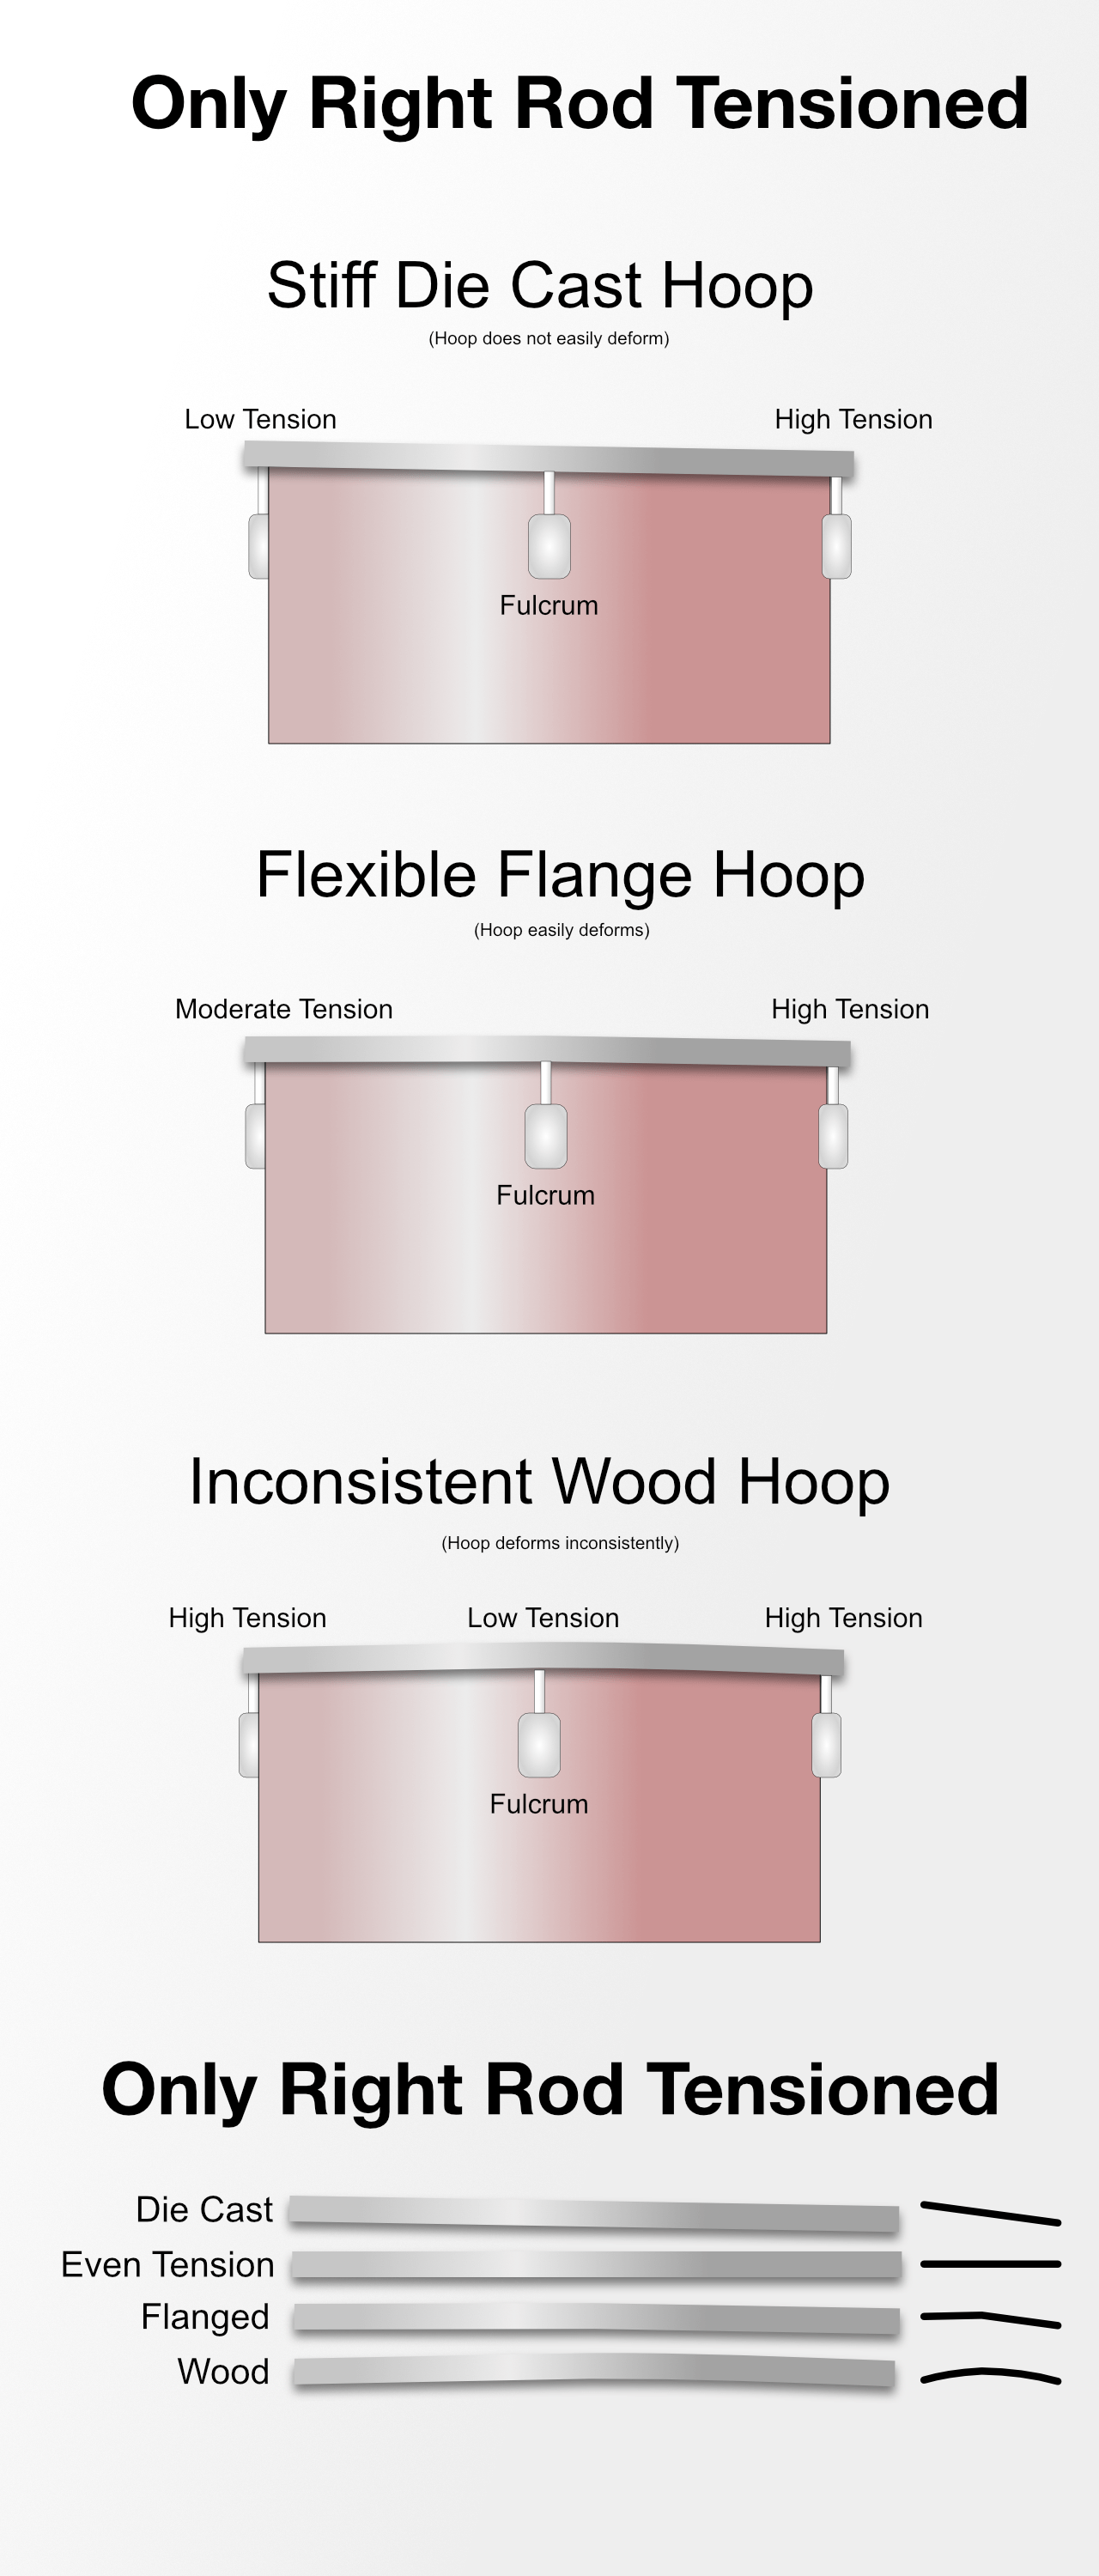
There are 3 main types of drum head hoops, all of which have particular attributes that affect how the head itself is tensioned:
- Flanged - (usually triple) flanged hoops present a consistently flexible force to press on the hoop of the drum head.
- Wood - Wood hoops present an uneven flexible force usually. The grain of the wood varies, along with the flexibility, across the hoop. This variance results in a single tension rod being cable of presenting force to a large part of the head (near stiff part of hoop) or a small part of the head (near a flexible part of the hoop). Some wood hoops are very stiff, and some are not, with the elastic modulus varying depending on the species and cut of the wood.
- Die Cast - Die cast hoops are usually the stiffest, and present a consistently even force given minimal input from the tension rods. With high-quality die cast hoops it’s possible to almost evenly stretch the entire drum head film with only two tension rods.
Surely these differences do not matter, because the purpose of the Drum Dial is to tension the head based in the film’s tension? RIGHT? RIGHT??
Unfortunately not.
The Drum Dial does give you an indication of the current film tension, but it does not indicate how to adjust it. The response to the data from the Drum Dial varies based on what is influencing the data, in this case: the drum hoop.
Turning a single tension rod does more than increasing tension on a single point. Depending on the type of hoop a variety of things can happen:
- Stiff - A stiff hoop will put opposing force on the opposing points. If you put tension on a point, then the point opposite will decrease in tension, and be more responsive to decreasing tension further.
- Flexible - A more flexible hoop will have less transfer of opposing tension.
- Usually wood hoops, but a variety of low quality flange, die-cast, stick saver etc… hoops can fall into this category! Some wood hoops are incredibly consistent as well.
- Inconsistent - Who knows!? Usually some combination of bow, and possibly an increase or decrease in tension on both sides!
Jump Ahead to learn to deal with this
Hoops Part 2
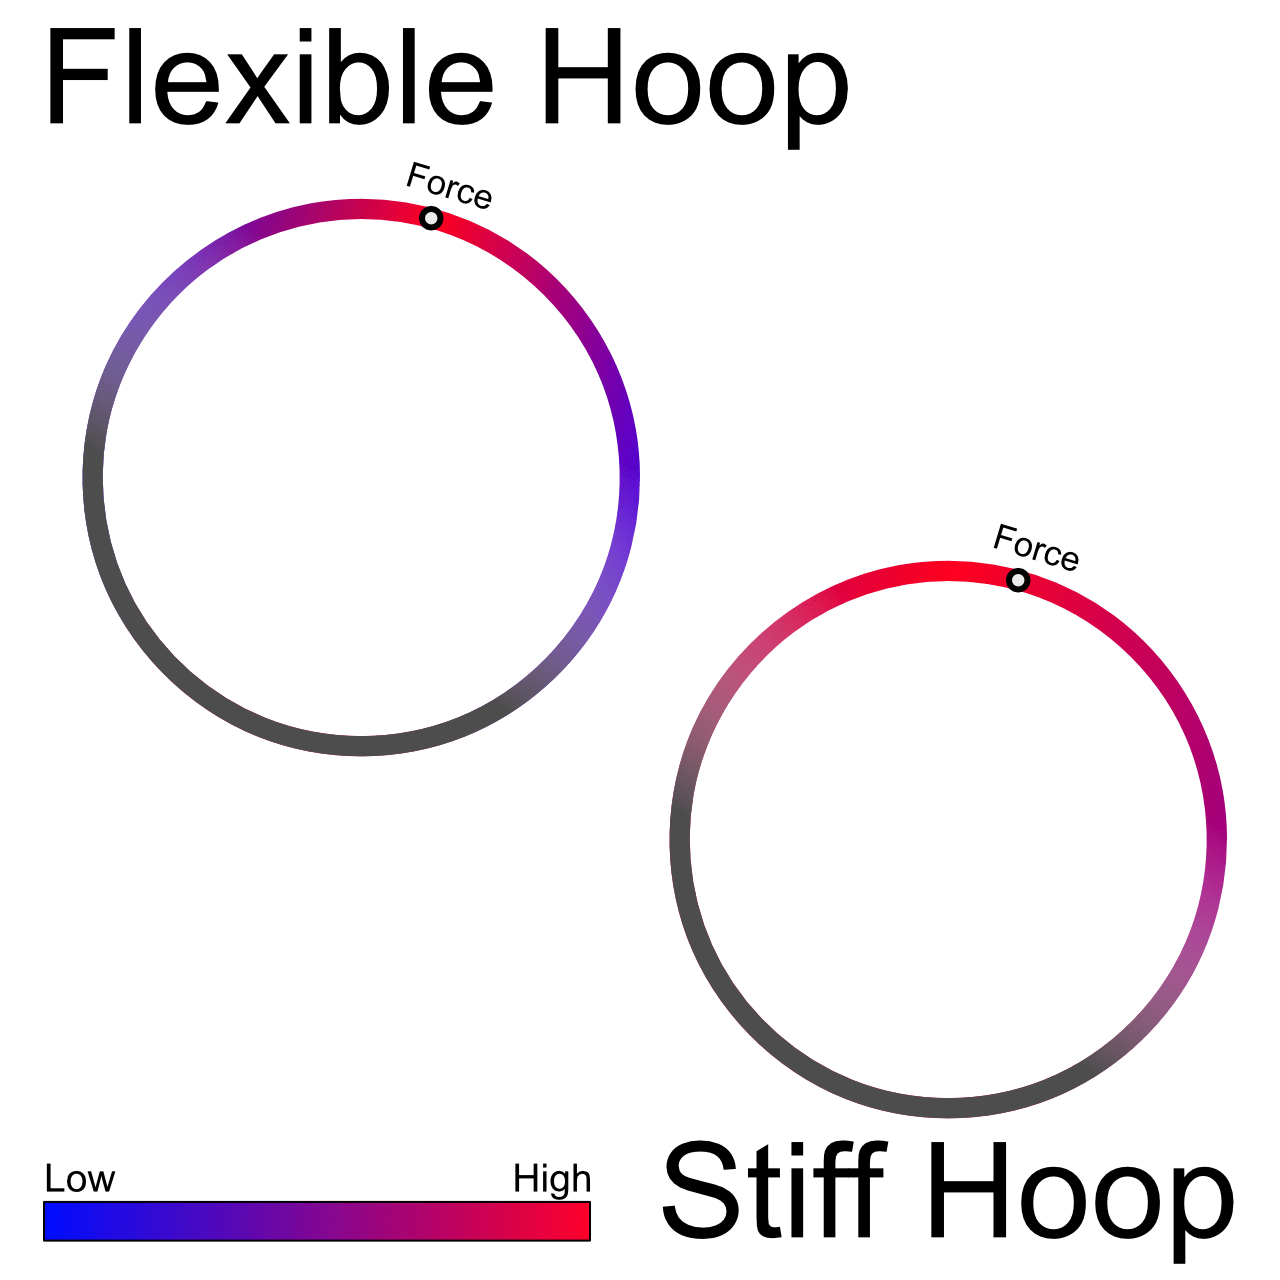
There’s more than just opposing force at play. The nearby points also are affected.
- Stiff - A stiff hoop will transfer more force to nearby points, even if the tension rods at those points are not in action.
- Flexible - A flexible hoop will transfer tension less readily to nearby tension rod points.
- Inconsistent - It’s in the name.
With a flexible hoop it is possible to tension a single rod with a lot of force, while nearby tension rod points retain most of their previous level. This phenomenon leads to ripples in the film unless the tension is adjusted, though this may be an intended effect.
These effects are compounded by each adjacent point of force. The graphic above is simplified with a single point of tension on an otherwise evenly tensioned hoop.
The distribution of tension across points of tension is directly related to film tension bands.
Jump Ahead to learn to deal with this
Bands
What I call “Banding” is something that occurs with more flexible hoops and lighter heads, and is less evident the stiffer the hoops are and the stiffer the head is.
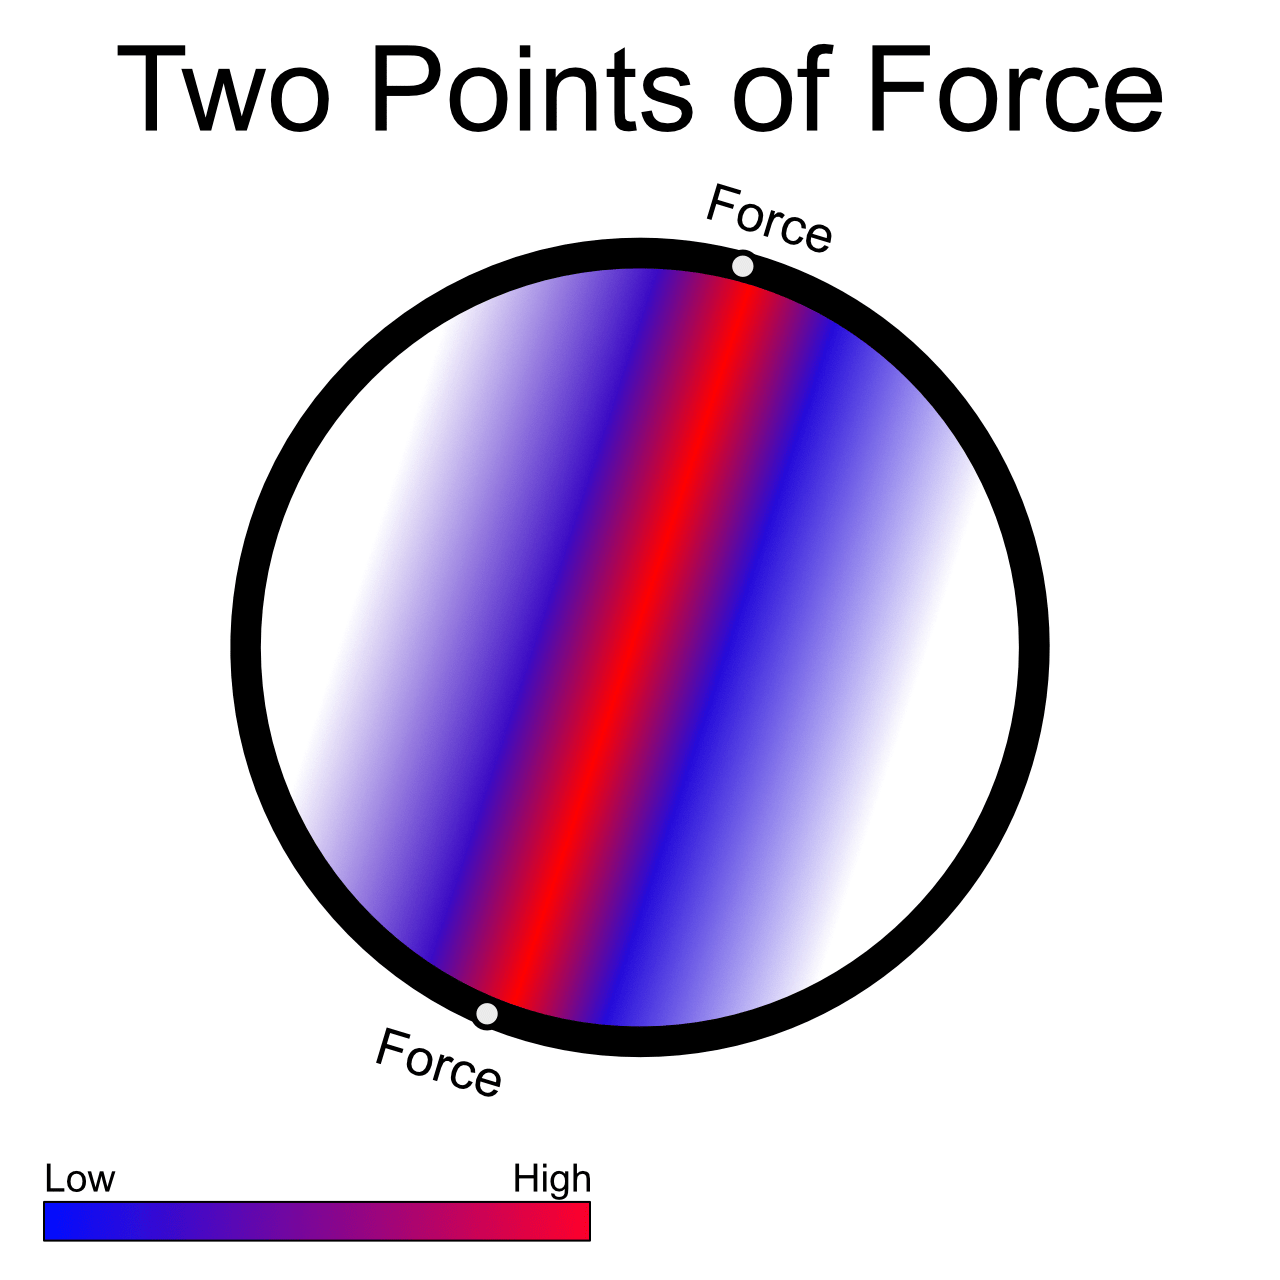
When two opposing points are tensioned, they create a band of tension that crosses the head between the two points.
Combinations of banding can occur, along with bands of uneven tension due to hoop stiffness.
Spots
Spotting is a combination of the above concerns. When there are points of tension in the film of of the head that “cross”, they result in higher tension at that point.
Spotting is the cause of misreadings from the dial. It’s possible for the dial to give a reading of high tension that does not directly correlate to the tension rod’s input due to the gauge head pressing down on a ‘spot’. Similarly low tension misreadings can occur from being near the edge of a spot.
The head film tension can become incredibly complex depending on the hoop, head, bearing edge and tuning practice. No matter what you do, it’s impossible to eliminate these ‘tension spots’. It is possible to reduce their influence though.
Spots can also be caused by imperfections in the drum head. Repeated bashes with a drum stick cause deformations in the film over time. These low-tension spots effectively work like damping rings since they are not influenced by the surrounding film and add nothing but weight to the head and interrupt the natural movement of the film.
Bearing Edges
The bearing edge is the part of the drum that the collar of the drumhead touches (or near the collar). This needs to be perfectly flat and consistent for the head to seat and tune properly.
If there is a small inclusion in the head then either the nearby tension rod must be over tensioned, causing a band, or it will cause the inverse type of band when under tensioned.
There is nothing that you can do except to correct the bearing edge. The head will never tune properly! This is an involved process that requires a flat surface the size of the drum and a shaper or router. It’s not difficult, but it does require some tools.
Once again THERE IS NO SOLUTION to fix a bad bearing edge. It must be corrected or it will cause bands and spots in the drum head.
Solutions
Hoops
There are no “solutions” here. There are 3 things to be aware of:
- Stiff hoops - When using a stiff hoop, if you tension a rod then nearby rods will become looser. Opposing rods will become tighter. As you’re changing from tension rod to tension rod, it can become confusing to figure out which rod will influence the head. The general rule is that with stiffer hoops, you need to always turn opposing tension rods at the same time.
- Note - the stiffer the hoop, the less likely it is for a torque wrench to help you. A single tension rod influences a wide portion of the hoop, which reduces the tension of nearby rods.
- Flexible hoops - Flexible hoops allow more leeway. The hoop is more likely to deform than the head at common film tensions. This means that it’s possible to maintain tension on all tension rods despite uneven film tension of the head. You can be more haphazard in your approach without much detriment.
- Inconsistent - You simply have to learn how the hoop reacts. A single tension rod may exert very localized pressure, or wide-bearing pressure. Experiment and verify with your Drum Dial.
To manage hoop variances, you can always tune opposing rods together. This process creates cross bands that you can track more easily.
It’s important to work in small increments as well. It’s easy to get carried away with half and full turns of your drum key to get the job done quickly, but the effect on the tension becomes difficult to track. You ideally want to tension the entire head as a single piece, but if you turn the tension rods too much at once then you are creating high tension bands. The higher the band tension, the more tension ripples you get parallel to the band and this can influence the readings of the Drum Dial.
To put it another way: the goal is to have the least variation in tension across the head. This is most easily achieved by small increments of change and always working on opposing tension rods in tandem.
Bands
Bands are your friend! (but only the small boys).
Creation of low tension bands is the process of tuning, it’s unavoidable, but it’s predictable.
It may not be precise, as I’ve shown in the image above, because heads/hoops/drums vary slightly, but it is possible to get a good idea of what’s happening.
As long as you create tension bands that cross the center of the drum, it’s possible to make educated guesses about where (very) mild ripples may be occurring (always adjacent to the tension band). Knowing where these variations in tension exists allows the user to interpret the Drum Dial readings intelligently.
The image above is a recreate of a real tension measurement, exaggerated, so that you can visualize what happens when opposing rods are tuned together. The tension is highest between the rods and becomes looser parallel to the line between them. The ‘soft spots’ and light ripples are easy to predict.
When moving the Drum Dial over the head, you can anticipate where the highest tension and variances will be. Ideally you want to put the Drum Dial at the point where the tension rod has the most influence. If the tension bands are maintained to cross center, that point will always be nearest to the tension rod!
Spots
The most common cause of spots during tuning is the “star pattern” of tuning. I believe that it is objectively bad and one of the major causes of tuning problems, along with poor bearing edges.
Look at the animation above, and look at how the tension bands are created. Can you honestly say that you can easily keep track of where the spots, bands and ripples are when using this pattern? Can you keep track of opposing and adjacent tension rod effects?
Absolutely not.
Compare this to dual cross tensioning:
The tension bands are always in the same place. There is only one spot of combined cross tension, in the center of the drum.
Drum Dial
It’s been a lot of chatter without mentioning the Drum Dial itself.
It’s essential that you understand the process of tensioning the head and the affect that the interacting parts have on the process. The Drum Dial is nothing more than a measurement tool, and if you don’t know how to measure or what you’re measuring then it’s useless.
Let’s dive in to how it works, how to use it, and how to make one.
How it works
The Drum Dial has a plunger that goes through a base. The base sits on the drum and a spring loaded plunger presses on the film.
The dial tells you how far the plunger can press below the surface in plane with the base. A system of gears attached to the dial are engaged with the plunger rod. A loose film will allow the plunger to ‘push’ more, and you will get a different reading than a tight film that does not allow the plunger to press.
Yep. That’s really it. Spring loaded plunger, measures how far the plunger can press itself below the base.
Setup
If you use the cross-tensioning method, the location of highest tension will be obvious. The caveat is that during the early stages of tuning there will be light ripples on each side of the tension band.
THE Drum Dial IS USELESS WHEN THERE ARE RIPPLES Even tiny ones.
Before you start making decisions based on the Drum Dial’s measurements, the head needs to be mildly and evenly tensioned.
THe “finger tight” method is espoused by most of the drum community but, some modern drums have nylon to make the tension rod not slip easily. Some tension rods are rusty (as I intentionally selected in the video above). Some people have poor dexterity. Finger tight is not the answer.
Take two drum keys, place them on opposing tension rods and start turning. While you’re turning rock your hands side to side lightly. Soon as the rocking becomes impeded, stop. The goal is to remove the slack and nothing more.
The rocking motion allows you to experience the backlash in the tension rods as they mate with the nut inside the lug. When the hoop is seated enough to remove the backlash, then you know that you have the minimum amount of tension necessary to start.
Read the last two paragraphs again. The goal is not to feel any play in the hoop. Try with just a tension rod by itself in the nut. Put a drum key on and jiggle it around. You can feel the movement in the nut and in the lug. Now try it with a tight head. You can no longer feel the backlash or jiggle. You want to tension the head just to the point where that backlash is taken up.
With stiff hoops it may be necessary to do the pre-tensioning process around the drum multiple times. The ability of a single tension rod to move the entire hoop can cause other tension rods to become loose.
Setup Notes
ALWAYS USE A WASHER between the tension rod and the hoop. Always. The washer will allow more free turning of the tension rod.
ALWAYS OIL YOUR RODS (heh?). It may seem contradictory, but adding a light machine oil to your tension rods like 3-in-1 oil will both aide with tuning and decrease the rod’s likelihood of disengaging (coming loose). Oil will also prevent rust. The practice of lubricating screws that are supposed to ‘stay in place’ has a long history and a lot of science behind it. Research it yourself… or just do it.
ALWAYS USE TWO DRUM KEYS AT ONCE. I can’t emphasize this enough. It’s so easy to become the metaphorical boiling frog with your head tension becoming uneven as you try to work one rod at a time. Always manipulate opposing tension rods equally until the head is at a desired tension, then you can opt to adjust single rods for effect or to correct for inconsistencies in hoop/head/drum.
Using the Dial
The Drum Dial comes with a spacer that allows you to space the dial equidistant from the hoop. USE IT
Once the head is pre-tensioned, don’t bother with sitting on it, standing on it, blow drying it or any of those other urban legends. Modern heads seat properly without issue. It’s 2019, stop using the coping methods of 1972 to deal with poor manufacturing.
Place the dial near a tension rod and tension it and the opposing rod about 1/8” of a turn. No more. Check both sides to ensure equal tension.
Repeat across the drum until you reach the desired level. Always tension opposing rods together, and always check to make sure they are the same tension.
It may be necessary to move the dial around to find the center of the tension band. Always take the highest measurement within an inch or couple centimeters near the lug, and along the hoop.
In the video above I tune a drum from the setup stage to fully tuned in under a minute. That’s a drum with sticky tension nuts, wiggly lugs and a moderately old head. It may take you longer initially, but the Drum Dial allows you to fine tune your process until you can get it done with minimal feedback from the tool.
NOTE - I use my fingers around the base as a spacer in the video. Useful trick if you want to work fast.
Troubleshooting
- Always a low spot - Your bearing edge is damaged. Fix it.
- Rod does not change nearby tension
- Bearing edge is damaged. Fix it.
- Stiff hoop - Try adjusting one of the two nearby rods, or the opposing rod, and see how it affects the tension of your target location.
- Flexible hoop - With flexible hoops it’s usually the opposing rod applying moderate tension and warping the entire hoop. You can fuss around with adjusting the target rod and opposing rod, but it’s almost always easier to start over.
- Dial’s value does not increase - Your head is at uneven tension. There’s a point where a single tension rod begins to spread its influence across the hoop rather than directly to the point in front of the rod. Work in small increments! If you reach this point, start over.
- One position reads ‘wrong’ even though the drum passes the ‘tap test’ - The tap test is bad. Beyond the scope of this article, but it’s inaccurate. Regardless of that, it’s possible that variations in the head, such as logos or divots, may influence the Drum Dial’s reading. Be careful to only place it on an even surface.
- Drum sounds awful.
- Your head is old, bad or a poor choice. Change it.
- Your head tension is uneven, start over.
- Your head tension is even, but the drum sounds awful that way - Way beyond the scope of the article. Try detuning a single rod, changing heads, applying muffling or other coping strategies. Proper head selection goes A LONG WAY. I’ve never had a drum that needed any of these tricks when the correct head was selected for the desired sound.
- You have poor taste. Can’t fix that, sorry.
- Drum Dial does not set to 0 on a hard surface - No big deal. Turn the locking knob on the bezel and reset it to 0 when placed on a hard surface. The actual value doesn’t really matter anyway, only the values between lugs.
Conclusion
With these concepts in hand, you can not only better use the Drum Dial, but better tune drums in general.
Then again, if you want a much more accurate method of tuning drums, then there’s even better avenues.
I spent this entire article talking about drums and not the Drum Dial because understanding how drum heads operate at a basic level is integral to understanding what you’re measuring. The Drum Dial gives you feedback about what the drum head is doing, but you need to be able to understand the origination of the measurement and its value to the process.
Then again… if you follow my advice, you’ll outgrow the Drum Dial pretty quickly. You’ll outgrow it faster if you use one though :)
NOTE - Obviously not sponsored by any company. I paid for this silly thing myself.
Meta
This post took 27 hours to research, write and edit.