Part 2 and the conclusion of the MeldaFreeform series review. Be sure to Check out Part 1 since that has a lot of info as well.
I'm also doing a short comparison between the Harrison AVA Mastering EQ and some of the Melda Freeform products.
Enough chattering... let's get on with it.
Contents
MFreeformAnalogEQ
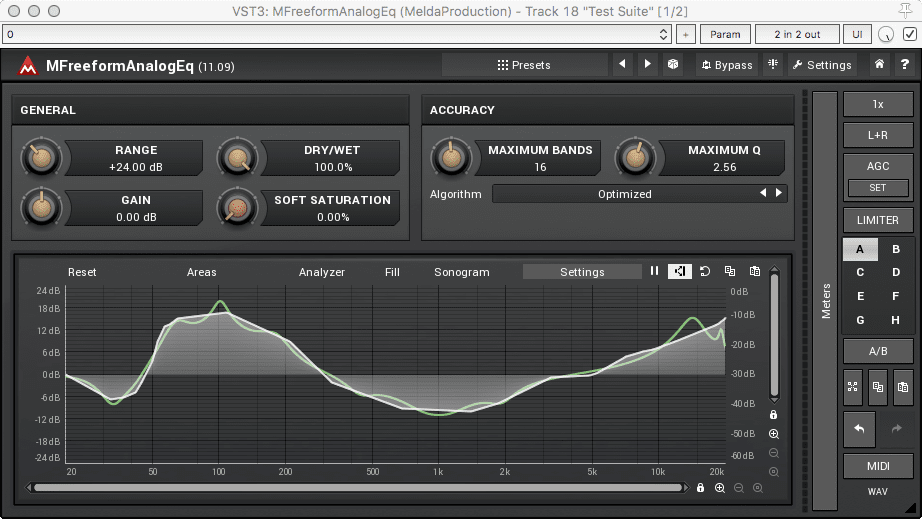
MfreeformAnalogEQ is a pretty simple concept. You draw a curve, and the plugin matches that curve the best it can with a selection of minimum-phase biquad filters. You select the maximum number of bands that it can use to match the curve, and how narrow those filter's bandwidth can be.
It has a saturation control that I'll discuss later.
So let's just hop straight to the testing!
Testing
Frequency & Phase
As usual I'll be comparing with Fabfilter Pro-Q 2 since I've confirmed this to be a wholly competent EQ implementation.
Setup
Here's the test settings used.
I used Fabfilter Pro-Q 2's EQ Matching feature to match the MFreeformAnalogEQ settings and here's what they look like:
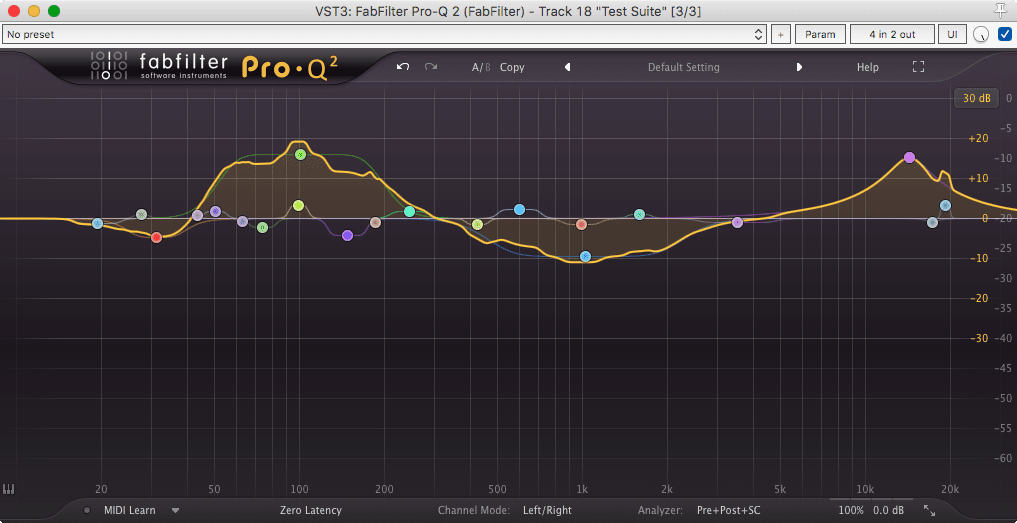
Note that I did not attempt to match the drawn curve. I matched the resulting curve. I'm simply looking at how the filters operate, not if the drawn curve is accurate. The drawn curve in this product will never be WYSIWYG.
Frequency Result
We're not looking for a perfect match here, since that would be a test of Pro-Q's EQ Matching capabilities and nothing more.
What is of note is the lack of cramping (which wouldn't happen in this curve anyway!) and the "smoothness" of the resulting curves. Mostly we can see here that the "green curve" in MFreeformAnalogEQ is accurate and does have an 'analog like' response.
This similarity is also important for when comparing phase response.
Phase Result
Given the similar frequency response, we can confirm that MFreeformAnalogEQ has an "analog like" frequency response, as we know that Pro-Q 2 does.
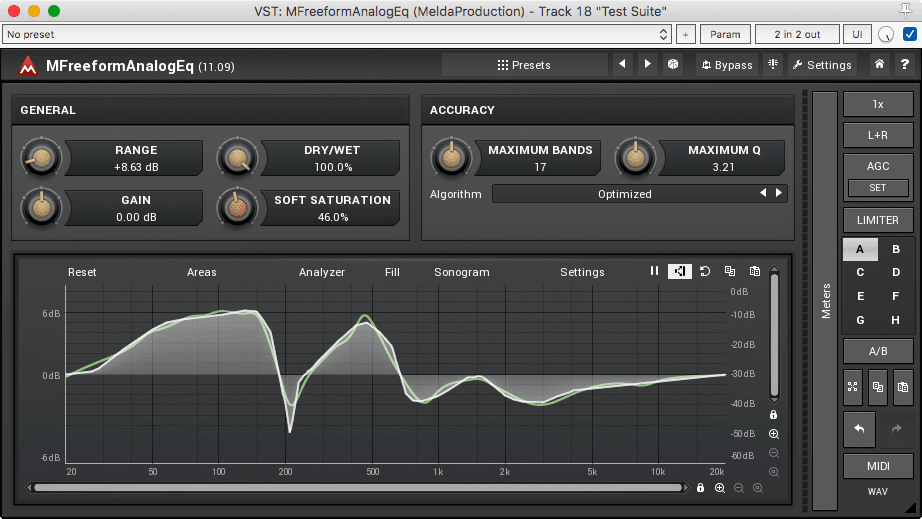
Saturation
MFreeformAnalogEQ has a saturation knob. As we can see above it adds some saturation, wow!
I have a ~1khz oscillator going in to it, and I'm analyzing with Voxengo Span. (I did not use MAnalyzer due to my unfamiliarity with the product. There were some artifacts when adjusting the oscillator that I could tune out with Span. I am not familar with MAnalyzer to achieve the same result.)
It appears that it adds 1st, 2nd, 3rd and 4th harmonics. This is an octave, a fifth and an octave. It's a rather pleasant sound. The "Analogness" of this is very similar to a tube-like saturation. It's more on the "warmer" end of tube saturation with less sizzliness (less harmonic extension, strong even harmonics).
Here I have oversampling set to 1x. You can see aliasing occur as I increase the frequency of the oscillator.
The aliasing is visible as you watch the harmonics. When they approach that red line (nyquist limit) on the right, the 'reflect' off it. Now they no longer have a direct proportional relationship to the fundamental frequency. This creates inharmonic noise that's just not very pleasant.
Luckily, This product has a nice oversampling section....
With oversampling set to 4x, you can see that the harmonics do not reflect. They simply disappear. That's what we want to happen!
So if you're using heavy saturation with material that has a decent amount of high-frequency information, then you should likely use oversampling. That goes for any product.
Evaluation
So what do I think about it? First, I have 7 issues with it:
-
Maximum Q isn't "maximum". It appears that the Maximum Q parameter changes the Q of all bands. I can create a curve that has a perfect match with 2.00 Q. If I lower the Maximum Q parameter then it changes the Q of all filters used to replicate that curve. If it was truly a "maximum" setting, then it would use the lowest possible Q to match that band, and only increase to a maximum. This is a mislabeling of the parameter I think, and it does affect the results you can get. However, these changes in results are largely a visual bother, the sonic differences are very minimal.
-
Maximum Bands has the same issue as 1. It often uses more bands than is necessary. With anything more than a very simple bell-like curve, it complicates the matched curve well beyond what is necessary to match it.
-
The "Optimized" mode is faster, but yields much worse results. Optimized doesn't appear to use low or high passes very often and is unsurprisingly less precise matching the curve. The default mode appears to always give better results but is painful to use in realtime, especially if you wish to use the "Maximum Bands" and "Maximum Q" parameters. I understand that there's tradeoffs made, but I would like more tuning of how these modes work. Default mode is really slow for me. Really, really slow.
-
Using analyzer controls often draws! When using the Analyzer controls surrounding the EQ drawing area, I often ended up drawing on my curve and ruining it. Very annoying. This appears to be a bug that may be fixed in later versions.
-
No way to reset parts of the curve in Draw mode. You have to switch, using the points panel, to node-based drawing to adjust things. It's not the most optimal workflow.
-
The "Draw" mode does not attempt to use the curve/smoothing features. If you draw something then switch to the point-based view you will have quite the mess. I'd like if there was a mode that attempted to match the drawn curve with fewer points if possible.
-
"Draw mode" is default no matter what. I find that Draw mode is not particularly useful. I'm often needing to seek-and-destroy, or want to make slight adjustments to what I have already. Draw mode makes this hard. Point-based mode is much easier to work with in a musical context. It's very rare that I know exactly the curve I want. It's an iterative process, and draw mode does not aide that process.
That said... it's not all bad!
- The saturation sounds surprisingly nice.
- The node-based workflow is great, even though the matching algorithm isn't ultra-precise.
- The "Range" knob is awesome. It scales the intensity of your entire curve with one simple control. Love the changes you're making, but what it all a bit less extreme, turn down range. Want more of a change? Turn up range. Every EQ should have a range control that is this simple.
For "musical" applications I found MFreeformAnalogEQ not the nicest to use, but for creative applications it's fantastic.
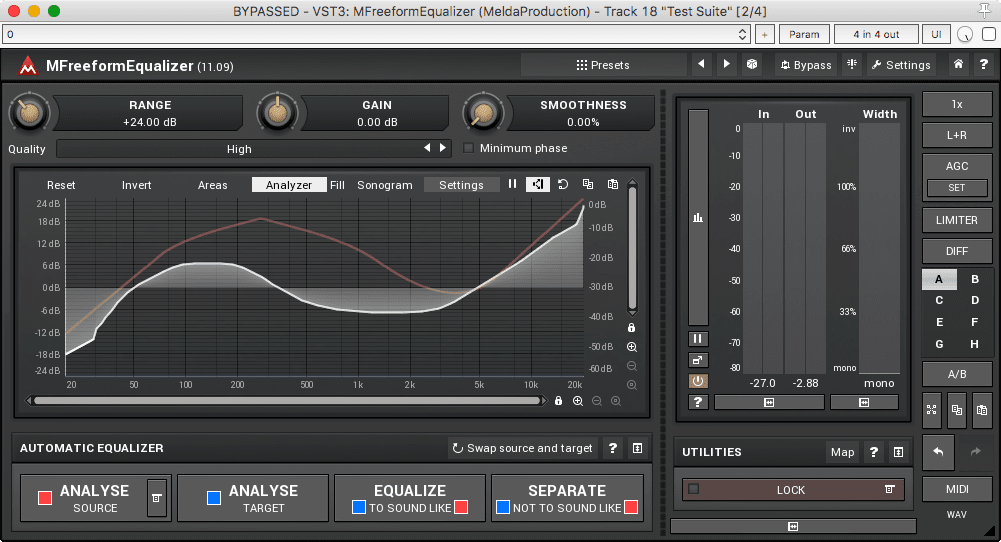
MFreeformEqualizer
MFreeformEqualizer is a total different beast from MFreeformAnalogEQ. You have the same drawing method available, however it defaults to linear phase operation. There's no attempt to match the curve with a selection of analog-like filters, it appears to simply be the best match possible.
There is also an additional functionality of curve matching, which I'll cover next.
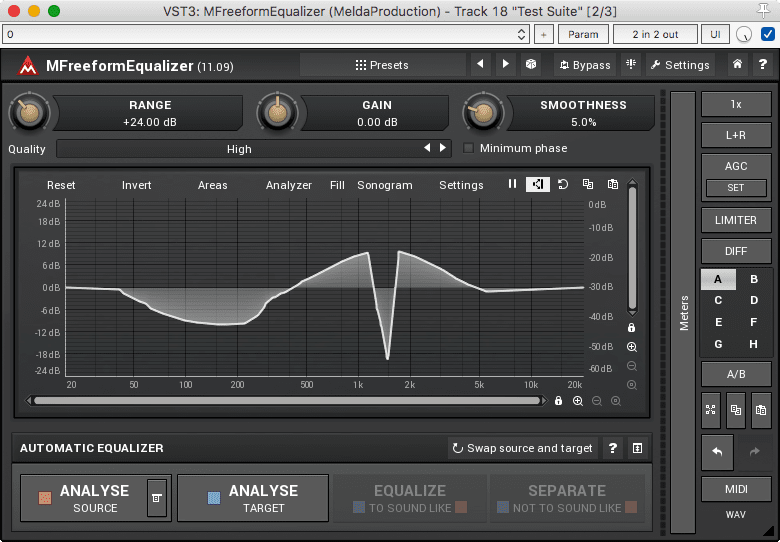
Automatic Equalizer
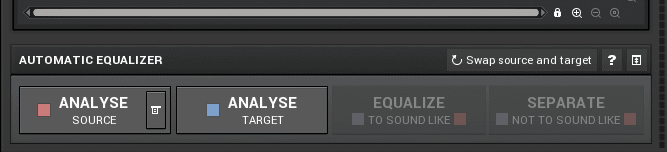
This is the fun part. You have some choices. You can analyze an input signal, analyze an audio file or draw an input curve. Once you do this, you can save/load the analysis if you desire.
Then you analyze your target. This is usually the track that you wish to equalize. From there you can 'Equalize to sound like' or 'Separate to not sound like'. They are fairly self-explanatory. Here's a quick video showing how easy it is to do this.
Here I'm working on a track, and I'm in the 'mastering' stage. Using MFreeformEqualizer I grab my reference track to analyez. Then I hit play and click 'Analyze Target'. Wait a bit for the track to play.
Click 'Analyze Target' again. Now I can match the spectral response of the 2 tracks, or make them sound dissimilar. The resulting match is really extreme with the default +24db range mode, so I turn that down till my curve is only about +/- 3db. It sounds great.
You could do similar analysis with a kick drum and a bassline. Then you would instead use "Separate to not sound like" to effectively 'carve space' for the appropriate element (which is usually the bass). The strength of the effect is once again adjusted with the range knob.
The only thing that you need to be careful of is not to use an MP3 for your reference. The MP3 codec likes to cut off your high end (which reduces information and makes it easier to do lossy encoding and compression). I used an MP3 in my example because it was quick. Don't do that!
Smoothing
Your capture curves can be smoothed or not. If you just want the general contour with a nice clean and smooth result, you can increase the smoothing. If you're in need of some surgical precision then you can turn smoothing off.
Then when you apply the result with 'Equalize' or 'Separate' it uses that smoothed analysis to apply your equalization.
Excellent. Cool stuff.
Testing
On to the test! Same procedure here as usual.
Frequency and Phase
Setup
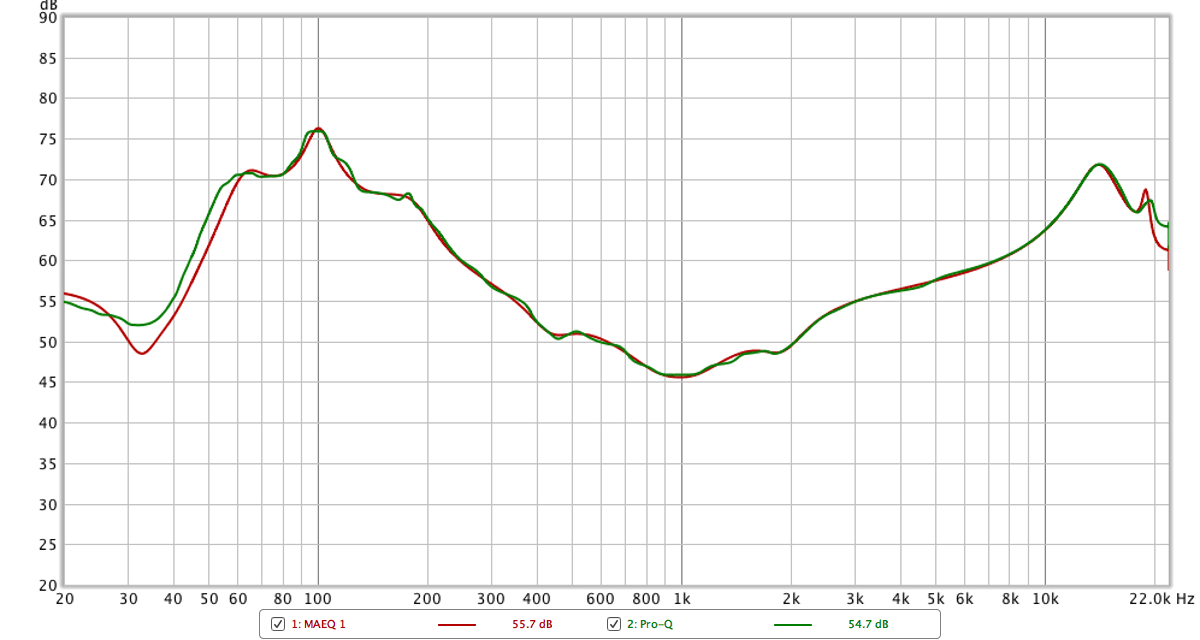
Once again I drew a curve. Then I matched it with Pro-Q 2.
Frequency Results
Everything looks pretty OK here. MFreeformEqualizer has multiple modes from Low->Extreme. There's also minimum phase and linear phase modes. The default mode is linear phase, so that is what the unlabeled mode is.
The notable thing here is to see what happens on the low-end with either mode. If you need a particularly smooth low-end response then it appears that the linear-phase low mode is your best option. Minimum phase higher modes do some crazy stuff.
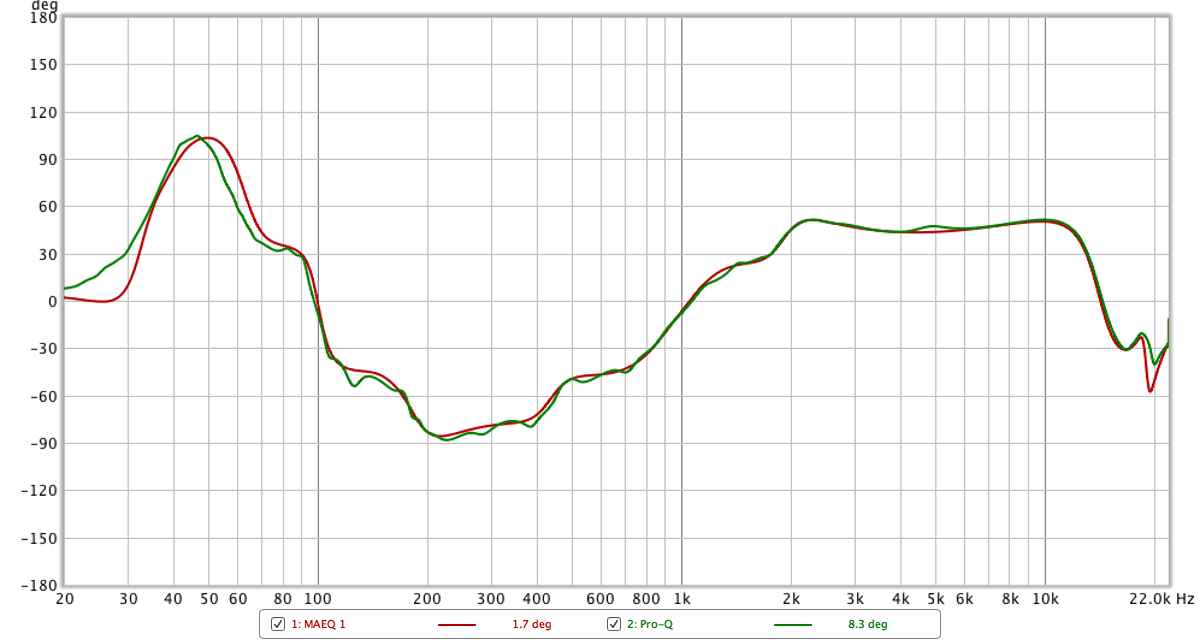
Phase results
Phase results are exactly what we'd expect. Minimum phase is all over the place with some of the modes. Linear phase is... linear phase.
I changed Pro-Q to green to make this easier to see. The ridiculous phase response in the minimum phase modes is due to the strange curve matching of MFreeformEqualizer. It has the expected phase rotation, but a somewhat unexpected curve.
Evaluation
Ok. I'll say it: MFreeformEqualizer is just nicer to use overall than MFreeformAnalogEQ. The only major thing you lose is the saturation, but the resulting EQ sounds better.
I do have the same complaint about the 'Draw' mode being default. Look at the video above. Doesn't that point-based system looks so nice? It's not as 'freeform', so I can understand why the draw mode is the default, but from a pure workflow perspective it's much nice.
The 'Automatic Equalization' is great. It doesn't require any special routing. It works fast. You can load audio files (to use reference material). For dialogue and SFX work, it's amazing. For musical work, it's amazing. It just works.
Something that I really enjoyed is that this works great as a guitar cabinet plugin. I can capture the frequency response of a guitar cab by running some noise or a sine-sweep through it then match that to pink noise. Apply the curve and bam. I have the response of the guitar cabinet. I can then use the range knob to adjust it.
You can even use it to just copy other plugin's frequency response characteristics.
On top of that, it's just an easy to use equalizer that gives intuitive results.
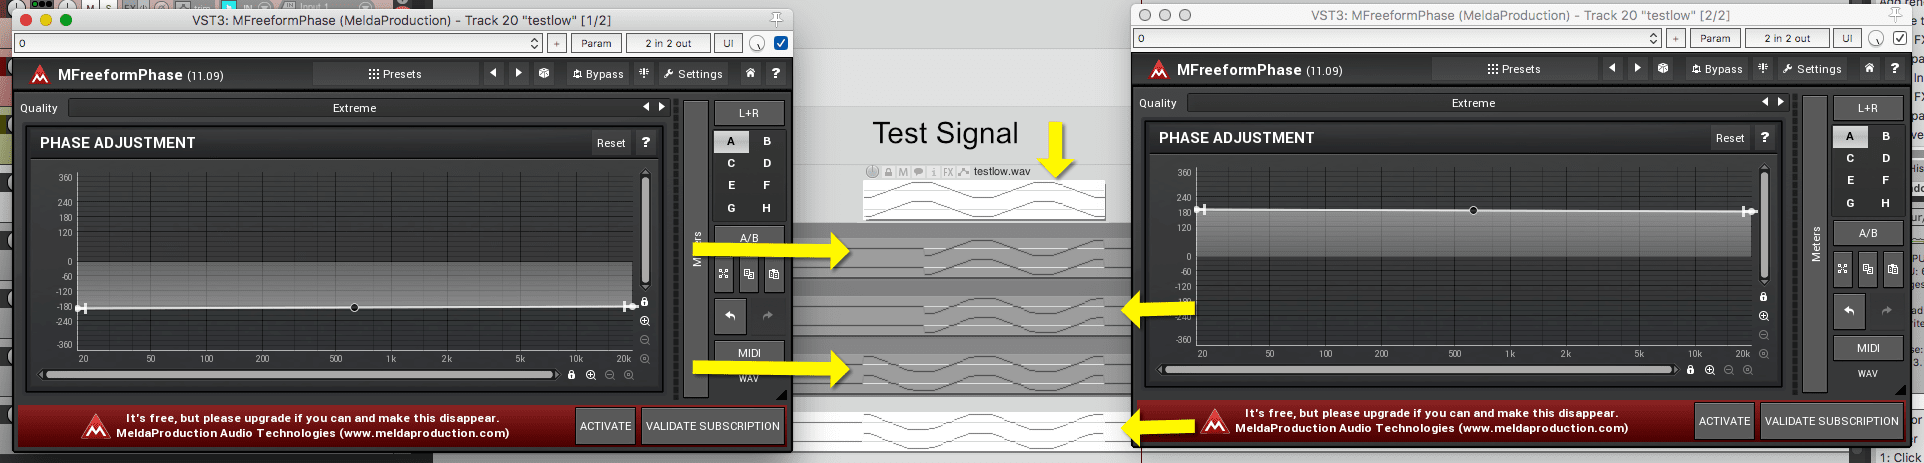
MFreeformPhase

I mentioned this plugin when I talked about phase before. Read that article to get somewhat of an idea as to why you may want to use this.
You may also notice that I don't have a license for this free plugin. Certain features are locked in the free version, and I neglected to ask for an NFR nor have I paid for it.
Testing
We're just looking at the results of MFreeformPhase by itself.
Frequency and Phase
Setup
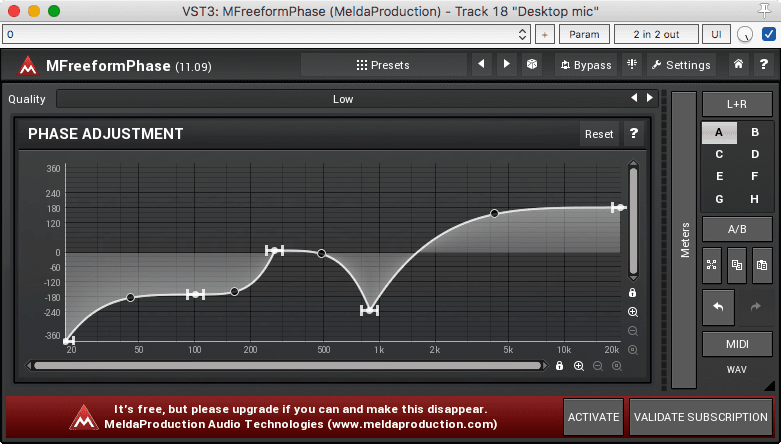
Here's our test settings. I specifically set it up with some extreme values in the high and low frequency area to see what will happen.
Frequency Results
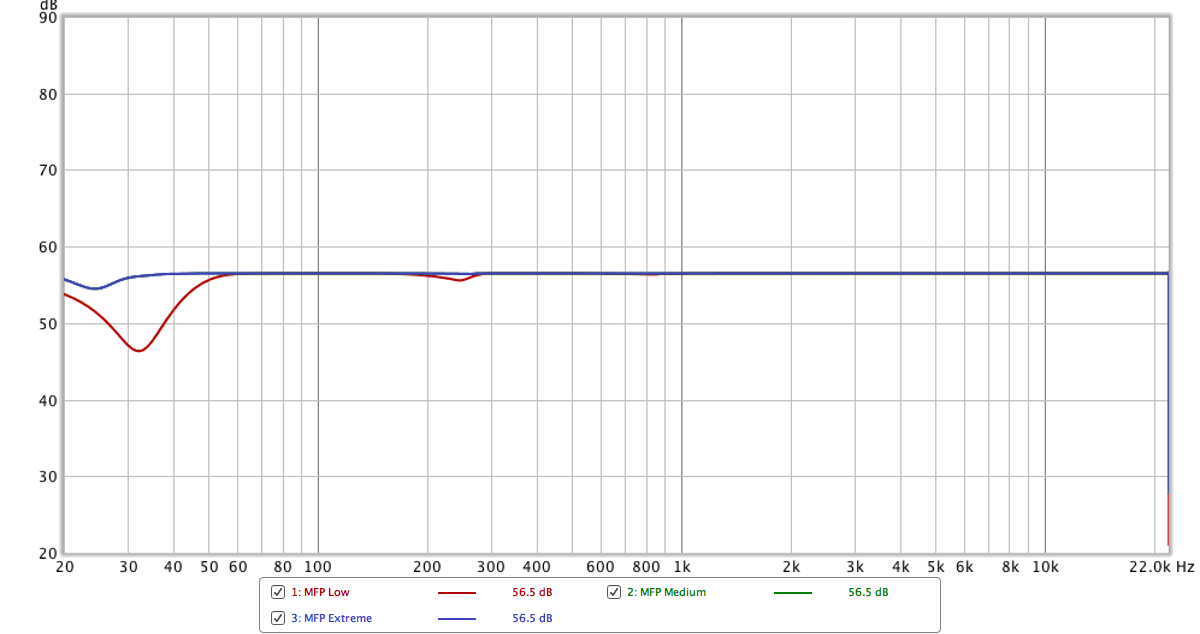
Basically what we'd expect. Mostly linear frequency response, with some deviance near the low end. Phase rotation of low frequencies requires some very large FFT sizes. It looks like MFreeformPhase uses an 8192 fft size in Extreme mode, which isn't entirely sufficient for a linear frequency response extended way in to the low-low frequencies.
Phase Results
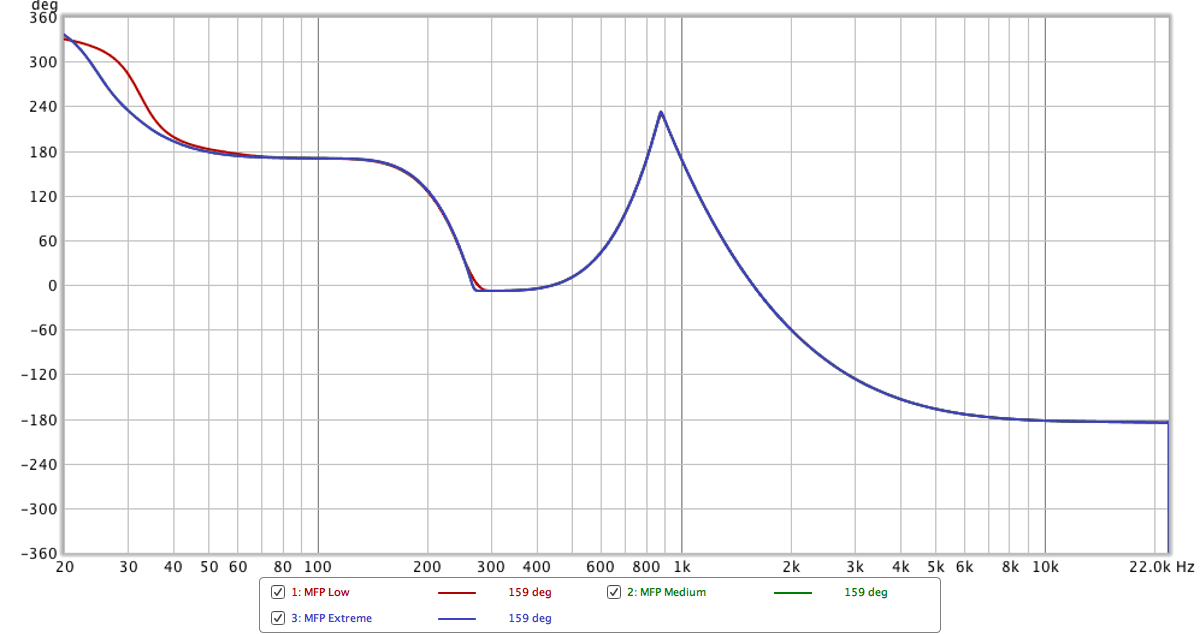
You may notice that our graph is inverted from what we see in the GUI. Strange...
Group Delay Results
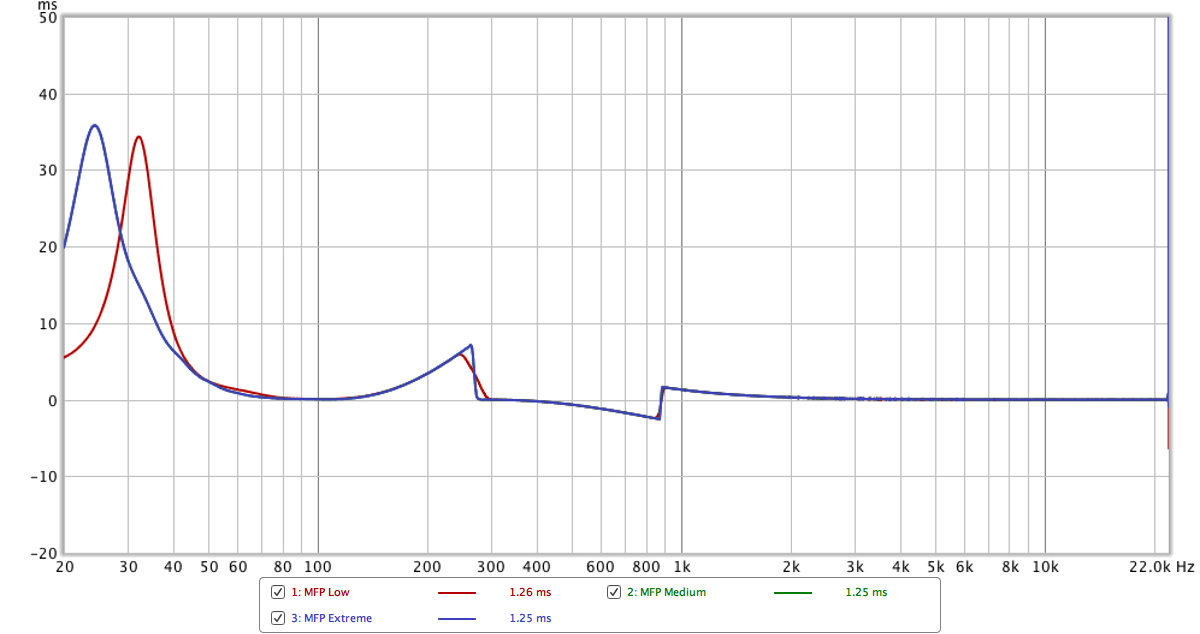
We can represent phase rotation as a delay of specific frequencies. If we rotate a frequency by a distance (in time) of 1/4 of it's wavelength then that's a 90° phase rotation. 1/2 is 180° etc...
The graph above is showing us how much each frequency is shifted in time. Even though we have a negative bass rotation specified, we have a forward group delay. Hmm... that's not right. We should have a negative group-delay.
Further Testing
I checked to see if my testing was wrong or if MFreeformPhase was. Here's how I did it.
- I took 1 cycle and 1.5 cycles of a 1,000hz waveform.
- I applied a ~180° phase rotation to it both.
- I applied a ~ -180° phase rotation to both.
Compare the results. Positive and Negative phase rotations are identical in result. That's not correct! They should be 180° polarity inverted. This mimics the results in the testing above.
I tried a few other times, and sometimes I got the 180° result. Hmm...
More Testing!
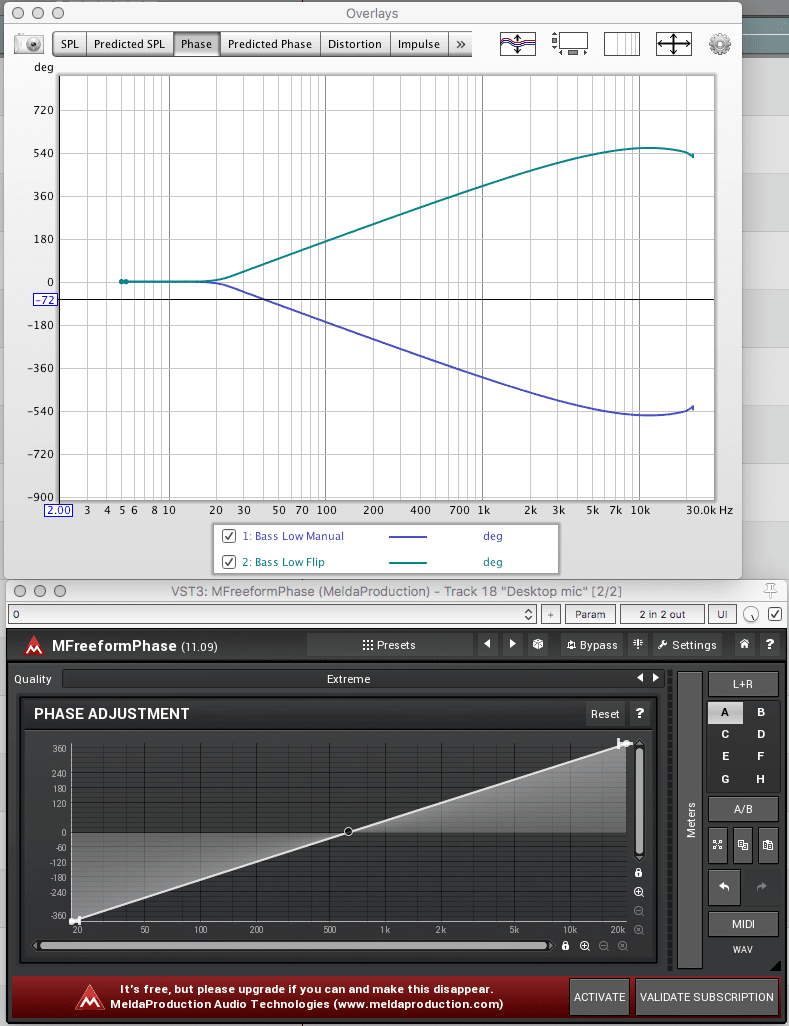
I eventually found the issue. Those 2 phase results above are for the exact same graph, there's one difference.
- Bass Low Manual (correct) - I manually dragged points in place and measured.
- Bass Low Flip (incorrect) - I manually dragged points in to the opposite places, right clicked the graph and selected "Mirror Y". Nothing changed... this is still the un-inverted graph.
When testing previously, I was using the "Mirror Y" function, and that was not actually mirroring the internal data it seems.
So there it is. We found a bug. It's not an important bug, but it's a bug.
Evaluation
Normally I would report the bug that I found, but I thought it'd be interesting to go through my bug-hunting process. It's likely that this will be fixed in further versions.
It's also largely inconsequential. Most of the time you would be using this product by listening to the sum of two signals while adjusting MFreeformPhase on one source. The most obvious scenario is when you have 2 mics on the same instrument, the difference in the sound's time-of-arrival between the microphones causes phase "issues". These can be adjusted
That brings us to the non-obvious use of the product: Messing with stereo signals. Often there's samples with various effects that aren't mono compatible, and you can fix this fairly easily using MFreeformPhase and a goniometer of some sort.
It's also quite interesting to use in M/S mode.
Given that this plugin is free, I strongly suggest downloading it and spending some time using it. Remember it is not particularly useful unless it's being used in the context of 2 similar sounds. Hearing phase changes alone is very difficult (if not impossible!). Read this article for some ideas
AVA vs. Melda Freeform
This is why I was asked to write these posts. I did an investigative report on AVA Mastering EQ and Lorenz of Xarc Mastering asked me about the Melda Freeform series.
So let's do it. First some tests, then some discussion
Testing
Frequency and Phase
Setup
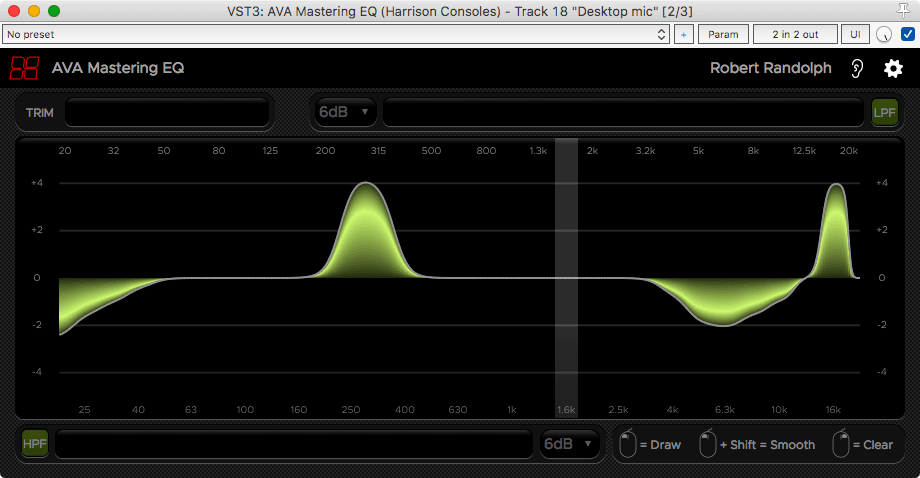
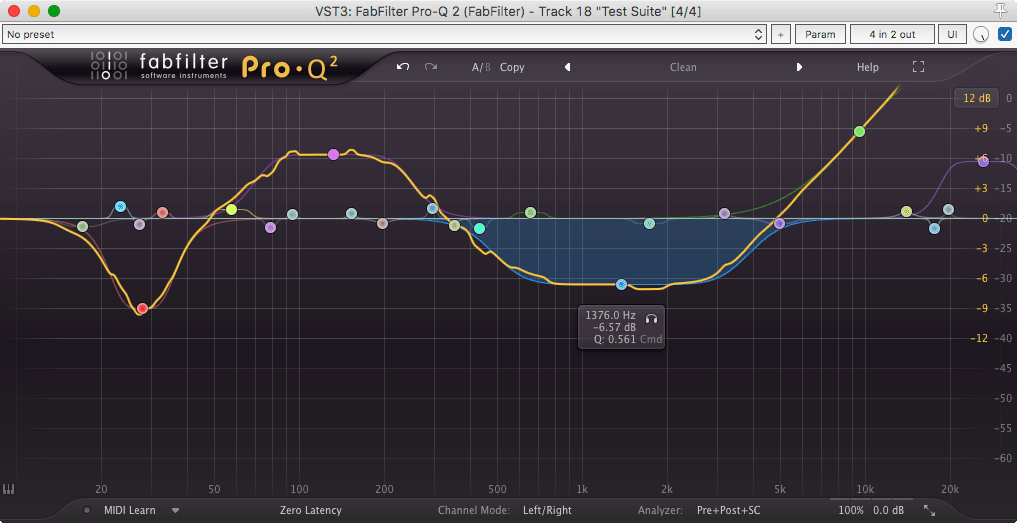
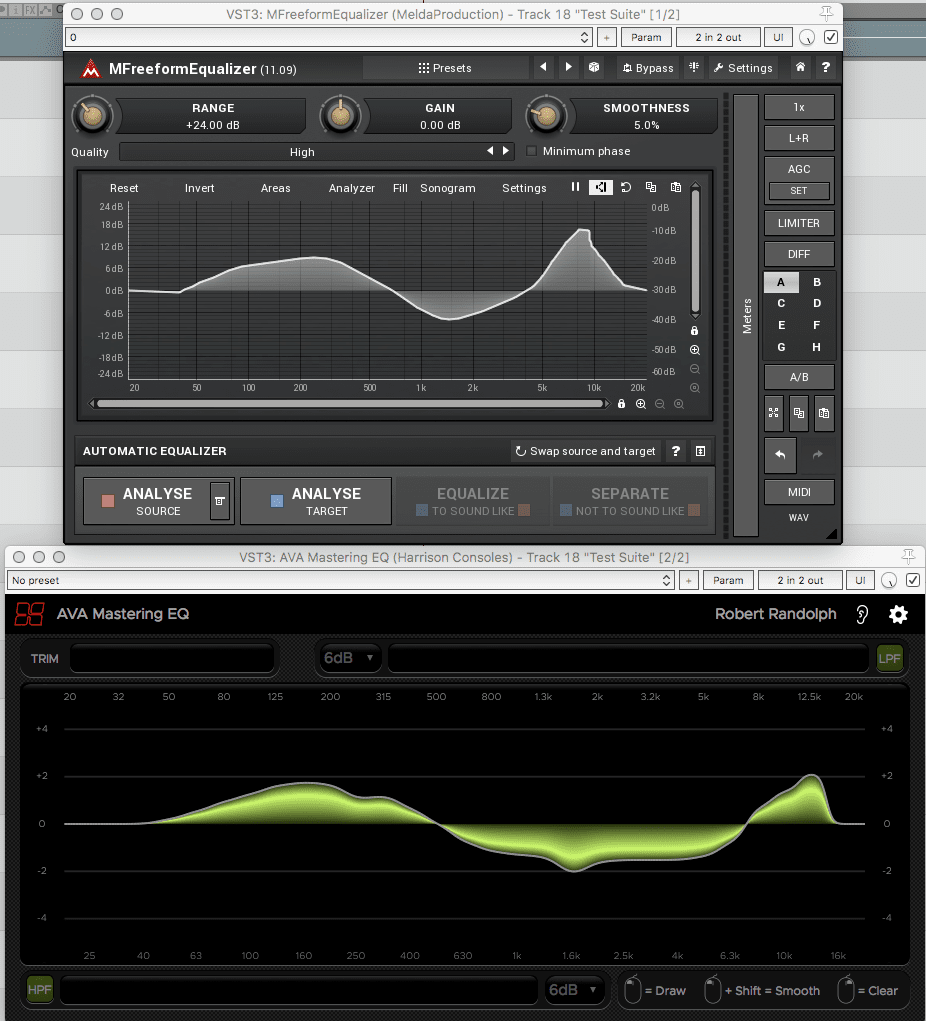
I took this curve in AVA Mastering EQ and replicated it in MFreeformEqualizer and MFreeformAnalogEQ.
This was all done by hand. It took me about an hour, but I got very close.
Frequency Results
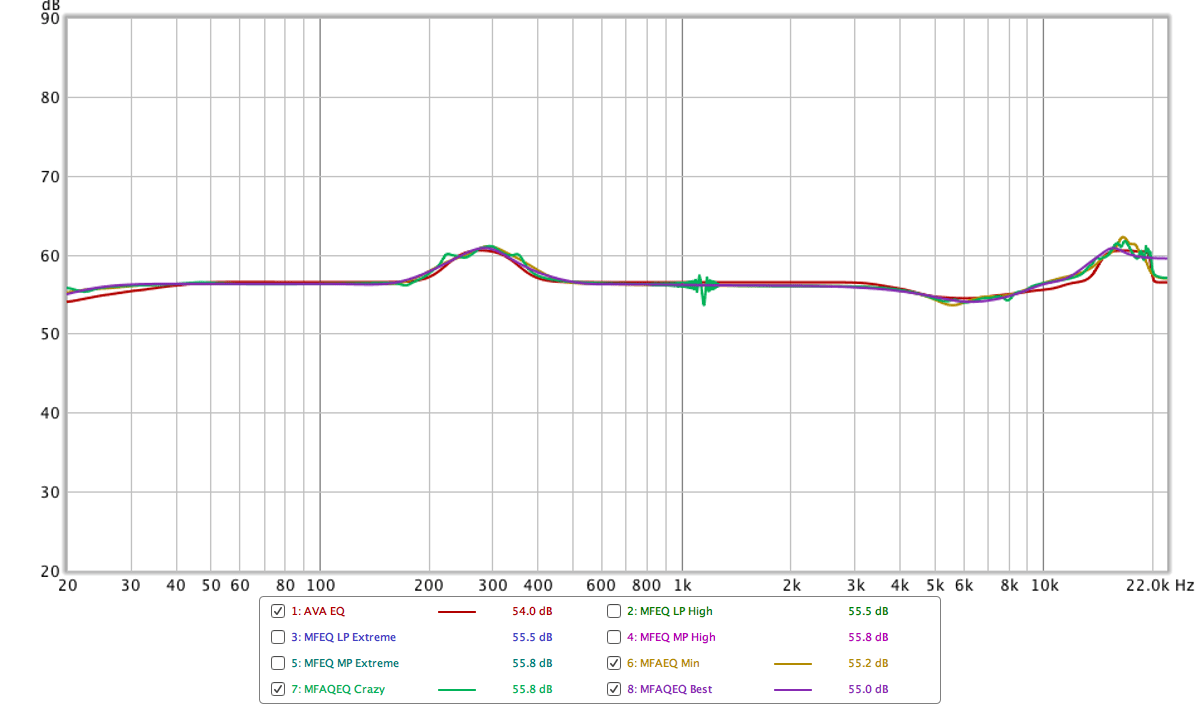
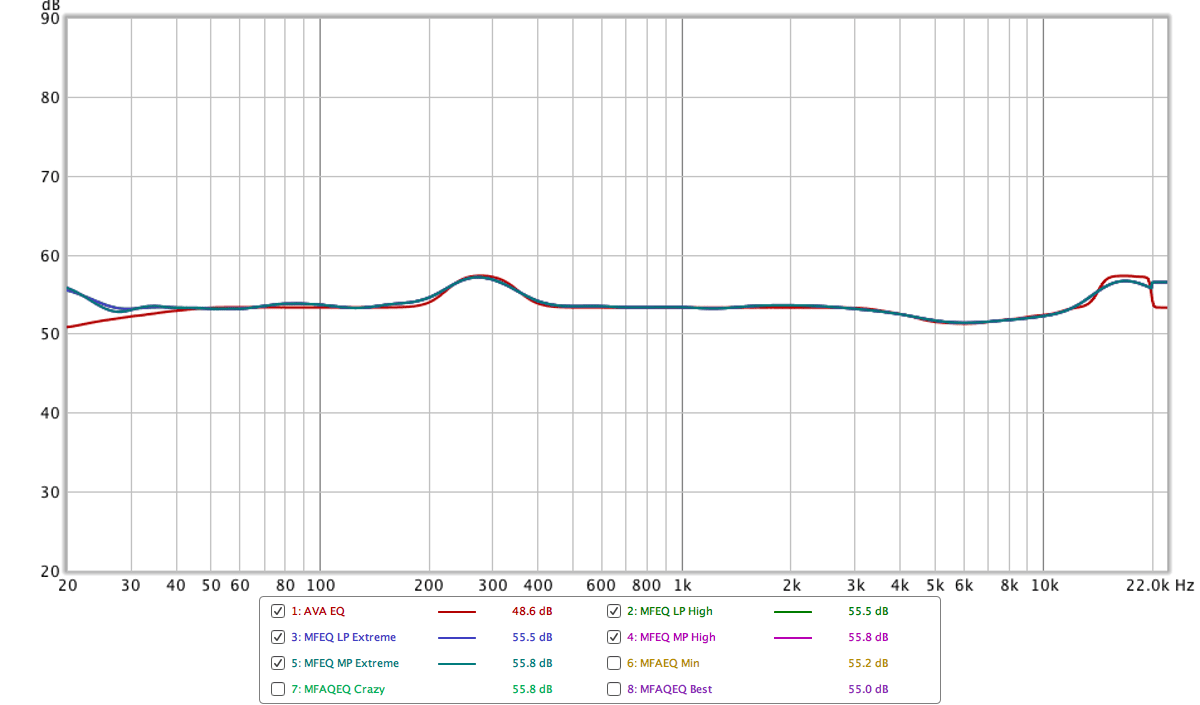
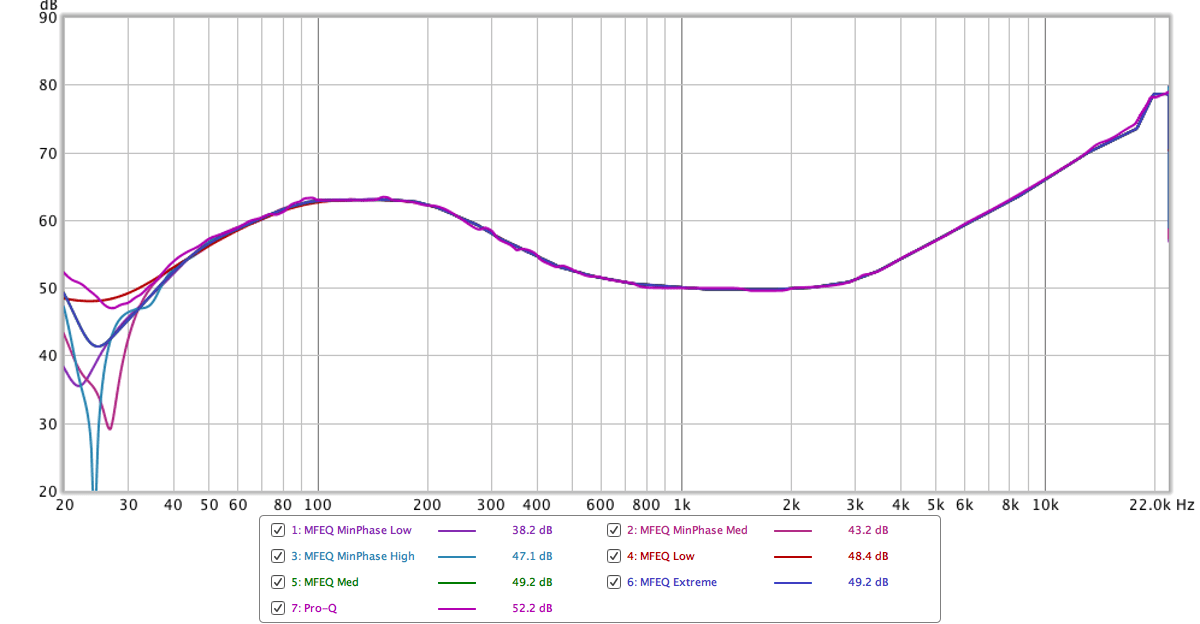
So here's the comparison between AVA and MFAEQ (MFreeformAnalogEQ) and AVA and (MfreeformEqualizer). MFreeformEqualizer has both LP (linear phase) and MP (minimum phase) modes represented.
What can we take from this? Well... using MFreeformAnalogEQ with a ton of bands (crazy) is not ideal. That's about it. They all are about on par.
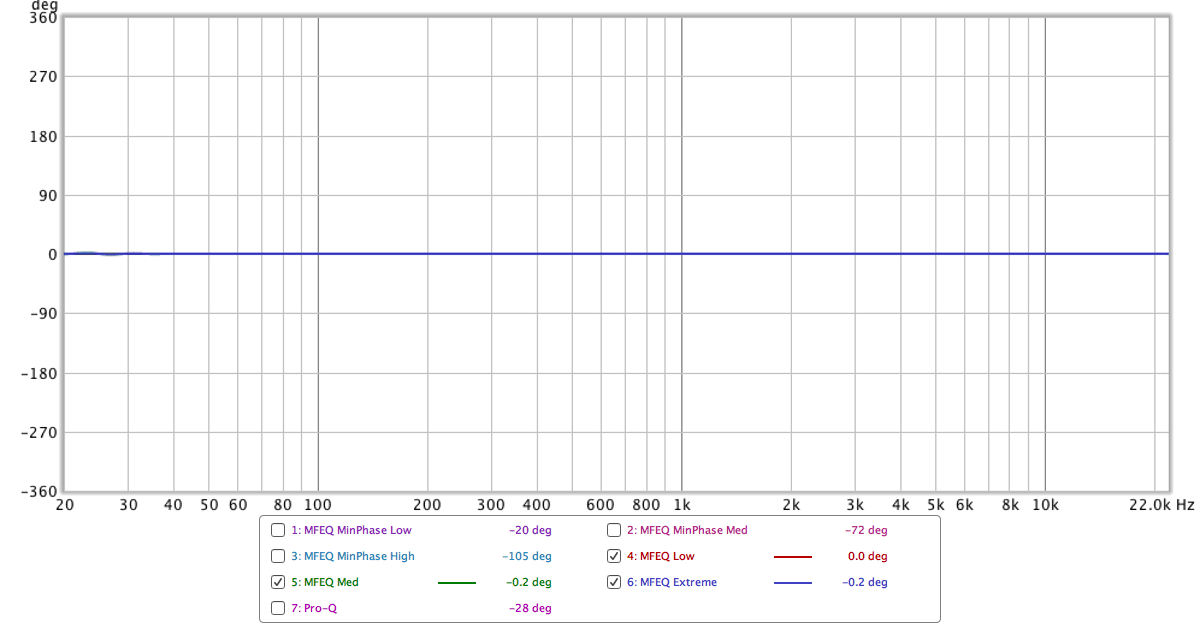
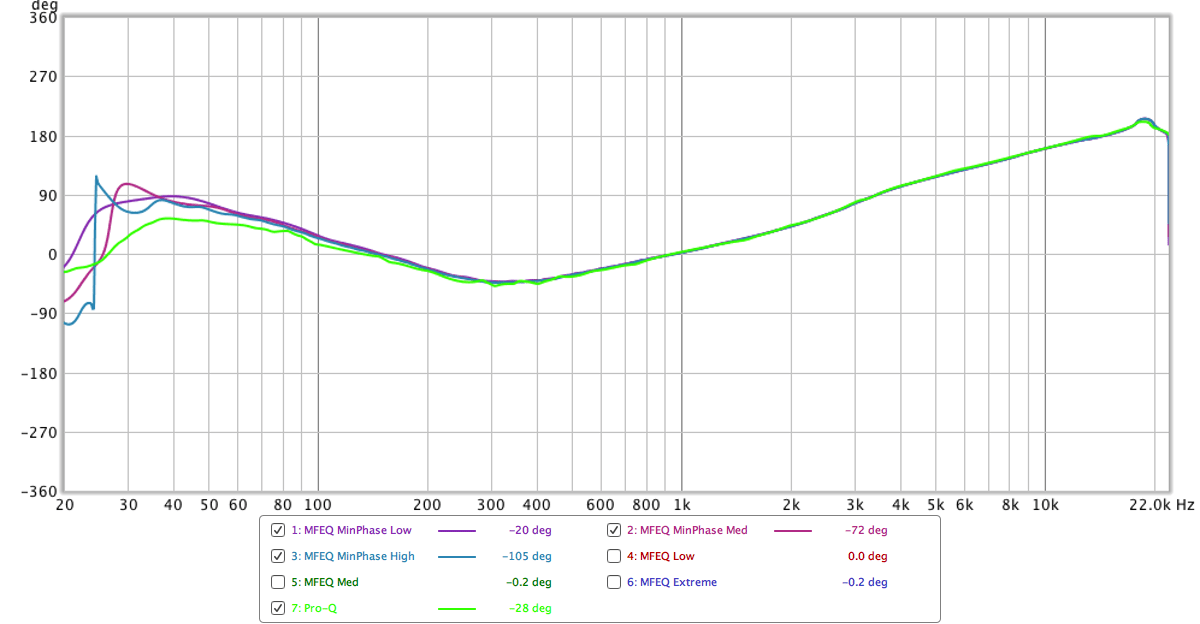
Phase Results
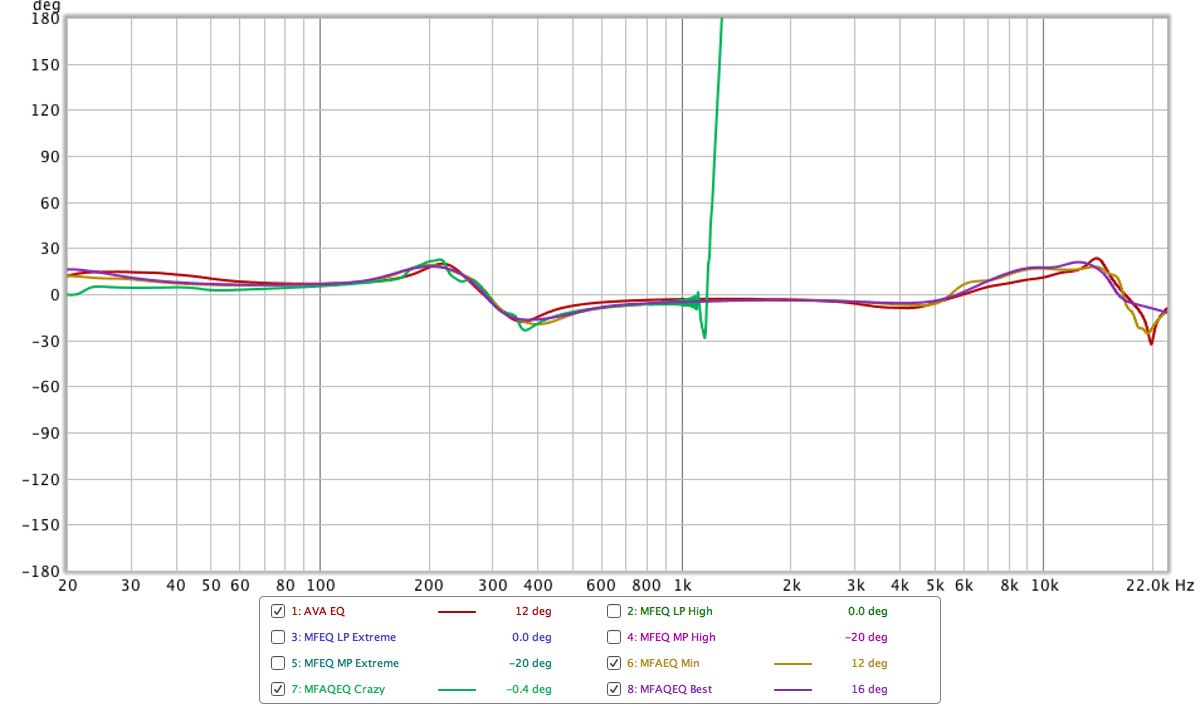
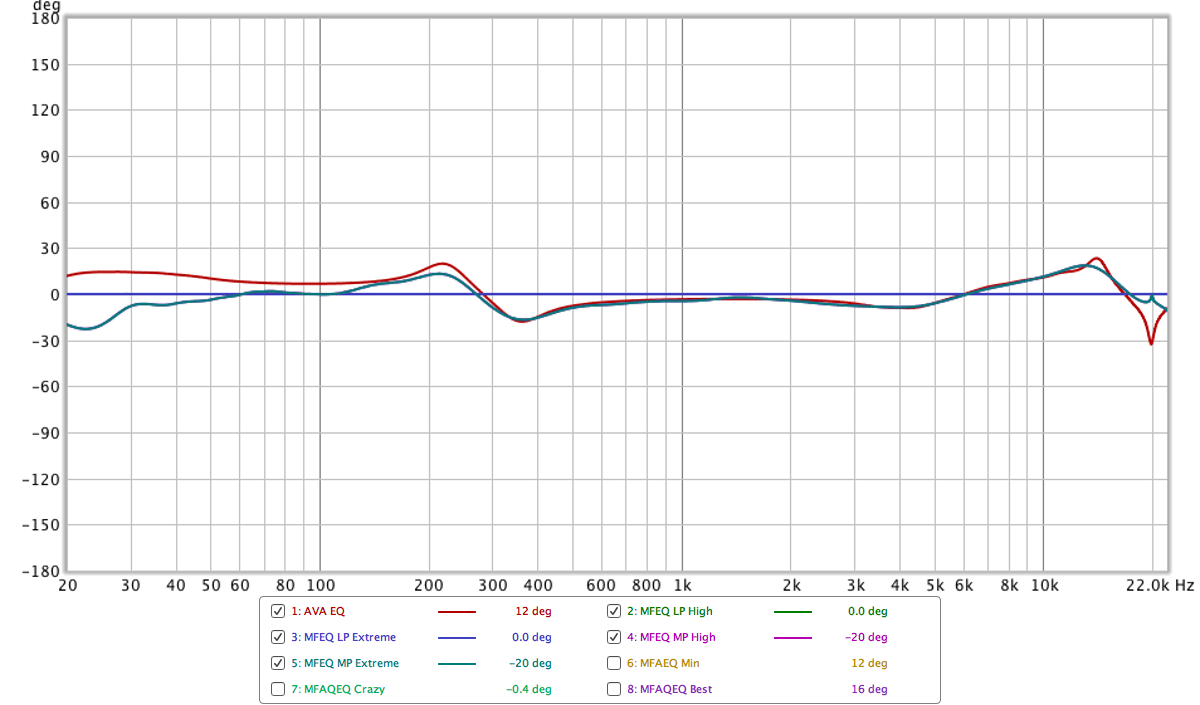
Once again, like we expected mostly. The MFreeformEqualizer in Minimum Phase mode with extreme mode gives is a "not analog-like" response, which is irrelevant really. It's just interesting to notice.
Evaluation
There's really not much of a comparison. The MFreeform series is a powerhouse of features that offers you some things you can't really get anywhere else, including in the realm of spectral response. MFreeformEqualizer also has the Automatic Equalizer which is not a unique feature, but AVA Mastering EQ does not have it.
AVA Mastering EQ has an amazingly effective and simple workflow. It's easy to flatten out areas, find a resonance then smooth out the surrounding area or make adjustments to the entire area as necessary. The GUI is auto adjusting and defaults to allow you to make very small changes. AVA Mastering EQ also by default has an 'analog-like' curve besides the Low Pass Filter (which isn't an issue with these Melda products).
The MFreeform series also allows you to work with the familiar point or node based workflow if you want, AVA requires that you work with a graphical EQ like system. Depending on how familiar you are with each system you may be biased. Once you 'draw' with the MFreeform series, the point-based system becomes basically useless if you want to make changes. AVA is always easy to adjust.
It really comes down to how much "power" you need compared your particular emphasis on a straightforward workflow. They are comparable products only in the fact that they let you draw a curve with your mouse, but once you go beyond that there's few similarities.
Conclusion
Personally, I really like MFreeformEqualizer. I am not familiar with the releases dates of these products, but MFreeformAnalogEQ almost seems like a legacy product. I was able to get comparable results with MFreeformEqualizer in nearly every case, and better results in many cases.
You also get the benefit of the Automatic EQ in MFreeformEqualizer. MFreeformAnalogEQ simply has the saturation, which is nice but it's nothing particularly special.
Comparisons to AVA seem to be unfounded to me. The design of these products seems to target different types of users, and the UX favours different mindsets when it comes to adjusting EQ curves. You can do "more" with MFreeformEqualizer, but there's a good chance it will take you longer to do simple things too.
Of course Melda has a large number of other EQs so it may be worth looking at what would best fit your workflow if you're set on a Melda product.
At the very least you'll always get your money's worth with a Melda product, even if you never use the core functionality ;)
Support Me!
This post took 11 hours to research, photograph, write and edit. If you appreciate the information presented then please consider joining patreon or donating!
If you appreciate the information presented then please consider joining Patreon or donating money/time.
