
Programming drums using 'just' MIDI is difficult if you don't have a lot of transcription practice. Transferring ideas from your mind to little graphical blocks representing some ancient underlying language (MIDI) can be difficult for even the best musicians.
Luckily with Cubase (and some other DAWs), you can use your main non-MIDI instrument to put together drum parts with minimal effort.
At this point you may think you know what I'm going to suggest, but indulge me and read on.
Contents
Video
A bit more in the text article. Video format here if you prefer.
Goal
Transcribing the ideas that you hear in your head to MIDI is difficult unless you are naturally a musician that plays an instrument with a variant that easily produces MIDI: a drumkit, a piano, maybe pads, etc...
Musicians like Guitarists, Vocalists, Brass and more are left to learn yet another facet of music that they rarely master.
I propose that there's an easier way for these tonal instrumentalists to get their atonal rhythms out. Play your instrument! If you can hammer out the basic rhythm on your instrument, then you're good to go. No more fussing with clicking in MIDI and shuffling tiny little shaded blocks around until it nearly sounds correct. Just play your instrument.
Guitar->Drums Voice->Drums Cornet->Drums Jew's Harp->Drums
Anything that can produce multiple pitches is ready to go.
The desired workflow is: record audio, convert audio to MIDI, feed MIDI to drum sampler (which you provide and setup yourself).
Incorrect Method - Hitpoints
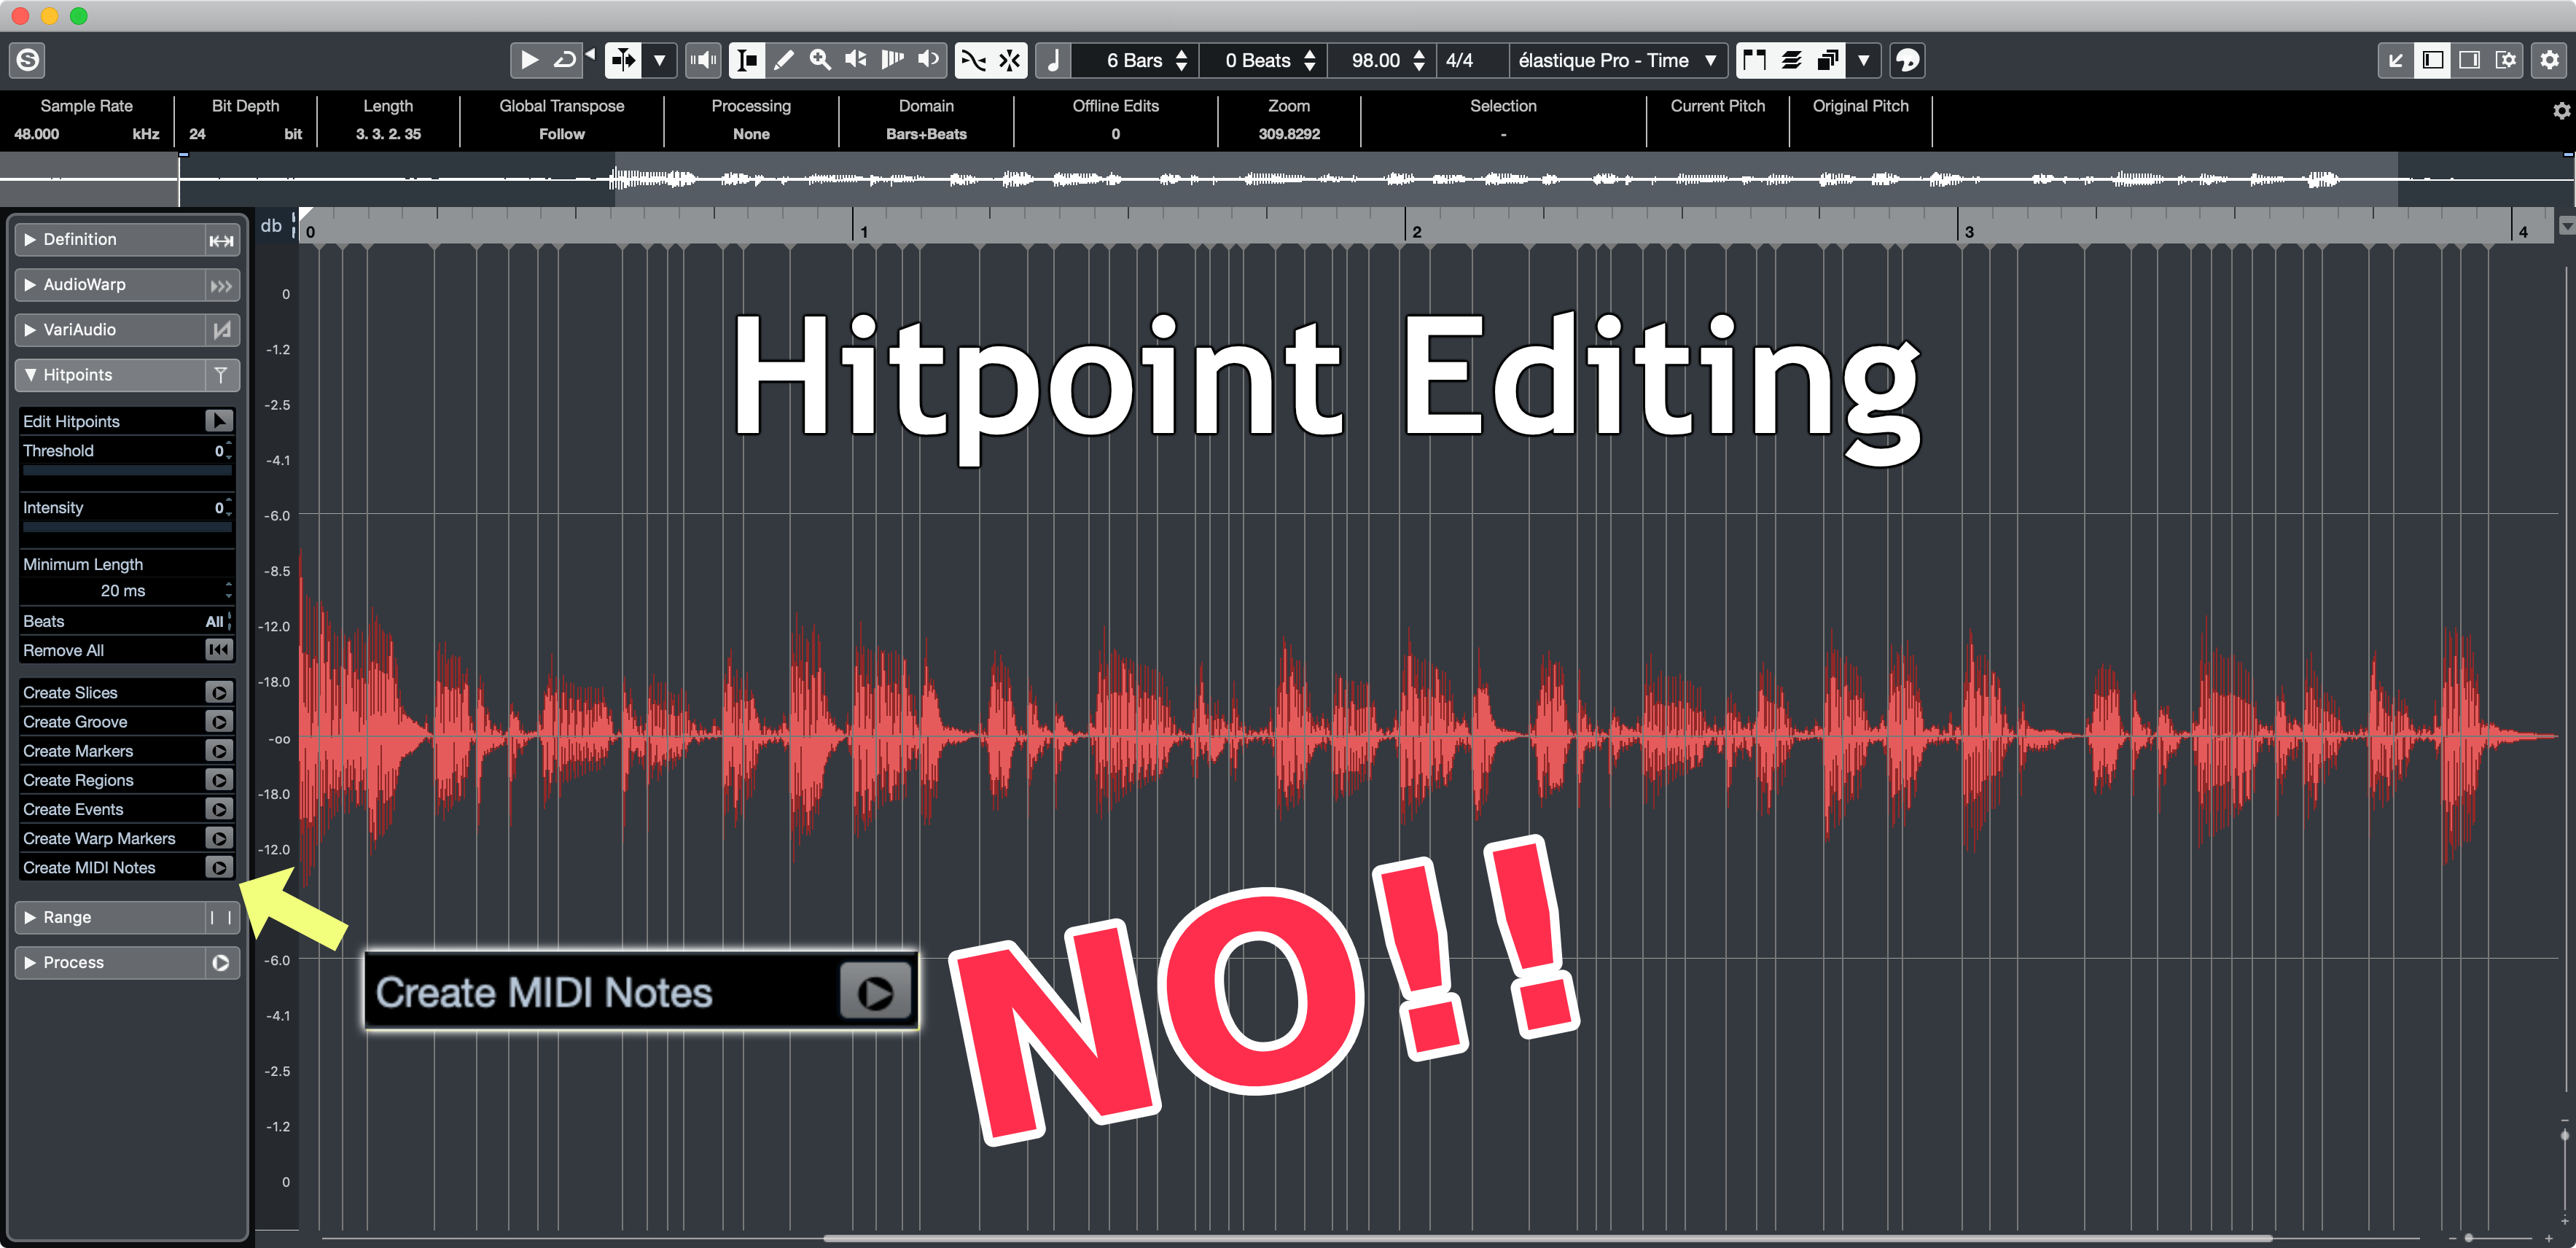
I think that the run of the mill intermediate user probably read the intro and thought of the "Create MIDI from Hitpoints" feature. You can play any notes that you want and Cubase will detect the onsets of the notes. The note onsets can be turned into MIDI notes with their onsets matching the hitpoints.
To access this feature, open your recording in the sample editor (Audio->Sample Editor), then utilize the Hitpoints menu on the left. You may need to adjust the threshold and intensity to pick up the note onsets that you want. When it's setup then click "Create MIDI Notes" and you're golden.
This is an excellent option! I suggest using it for things like hi-hat parts or snare fills. As a guitarist you can mute your strings and use sweep picking or similar techniques to execute rhythmically complex.
BUT
Programming a single drum at a time is tedious. Let's improve upon this workflow.
Proposed Method - Pitch
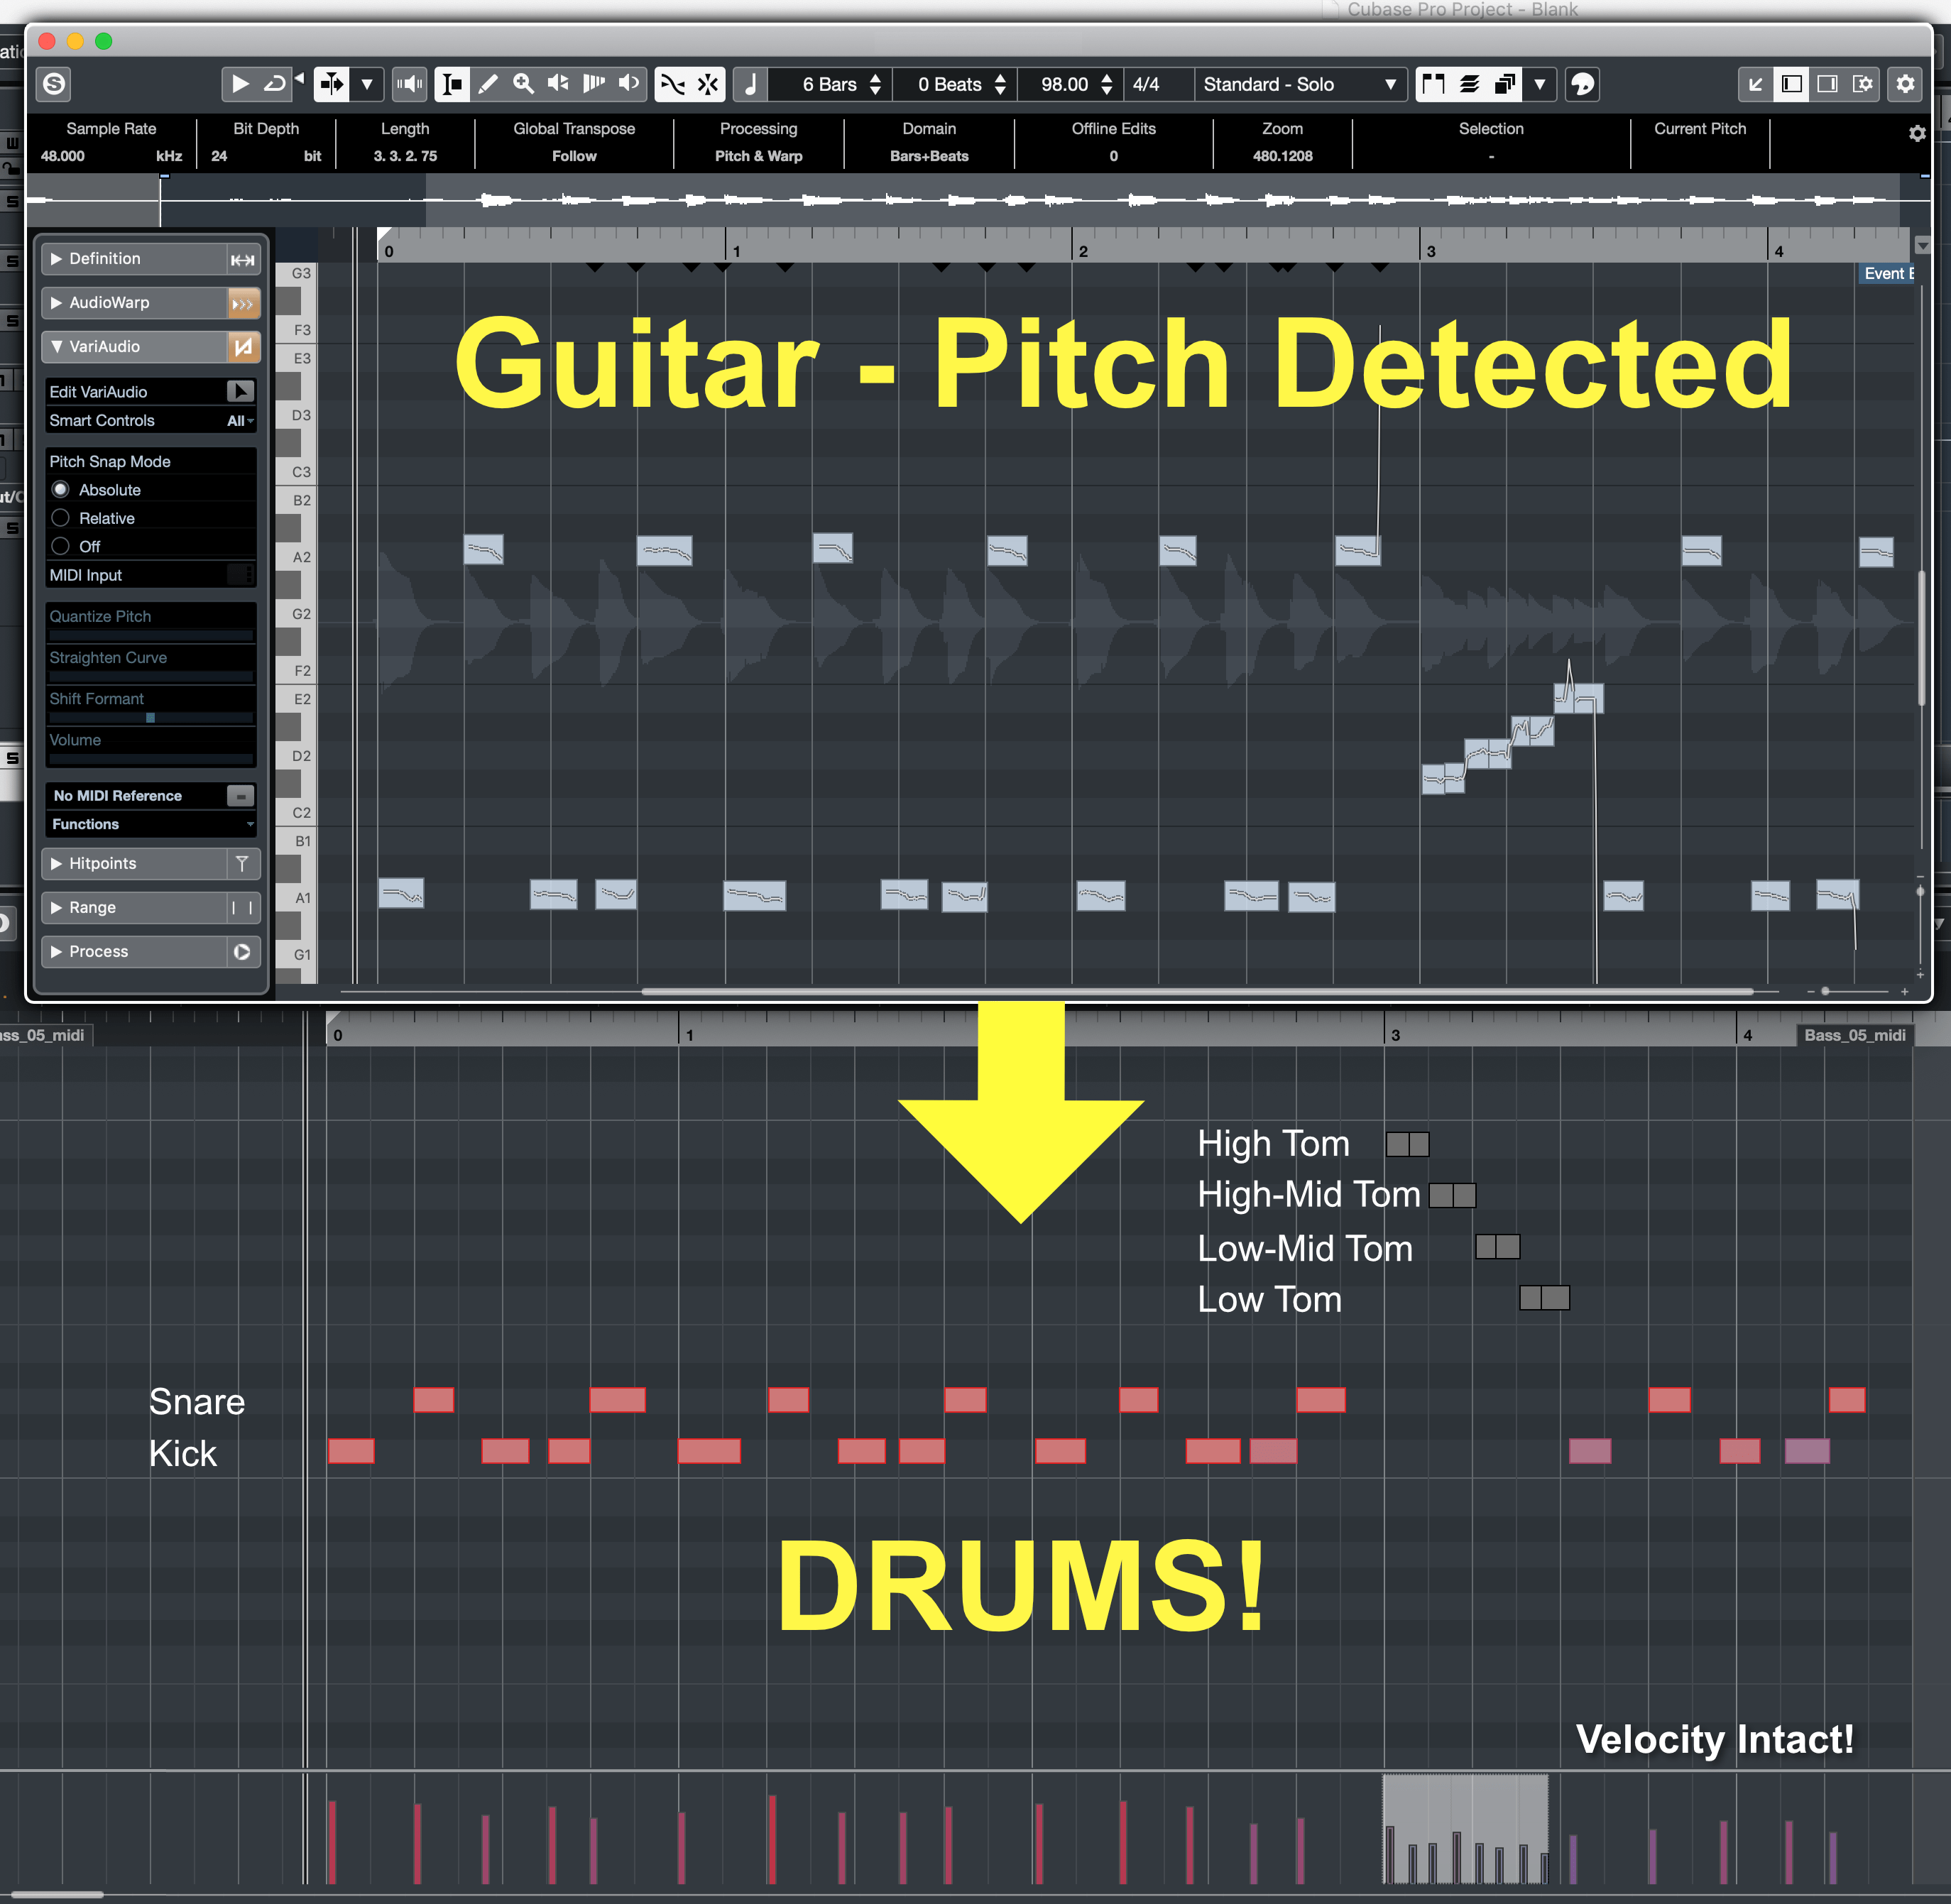
Cubase (like Logic and Digital Performer) come with their own monophonic pitch detection engines. Feed it some audio and it presents you with a MIDI-like pitch editing system. It's not only MIDI-like, but it can export MIDI directly.
Play your instrument, and imagine that each note is a drum. You now have sufficient knowledge to program linear drum rhythms with minimal effort.
Ideally you would play the notes that correspond to the drum triggered by your drum sampler, but you can play whatever is comfortable to you. Shifting all notes of the same pitch to another pitch is easy enough in Cubase.
BONUS! - If you stick with it, you'll improve your timing on your instrument of choice as you saunter along the frustration riddled path of not choking when the record light is on.
How to
The performance must satisfy these characteristics:
- Tonal - Each note must have a defined pitch.
- Mapped - Each note must, at least in your mind, represent a drum.
- Monophonic - at least in Cubase 10, you can not play two or more notes at the same time and expect both to be detected.
For note selection on your instrument you have two options:
- Play each note as it is mapped to your drum sampler/synth. If the Snare is D, then you play a D for the snare. Kick is C, so you play a C for the kick etc...
- Play notes that differ from the drum part's mapping and edit them later. This has a distinct benefit: you can select notes that are mechanically better suited for rhythmic playing. I'm a bassist at heart (and by training), so I naturally prefer to play a given root (C) for the kick, and the octave for the snare. Tom fills I just play a chromatic run starting on the third. You can choose whatever you want.
- If you choose this method, know that you can select all notes in the MIDI editor by Ctrl(Windows)-Command(macOS)-clicking the note in the piano roll to select all of that pitch. Arrow keys move the note a semi-tone. Shift-arrow-keys move the note an octave. Re-organizing notes takes seconds.
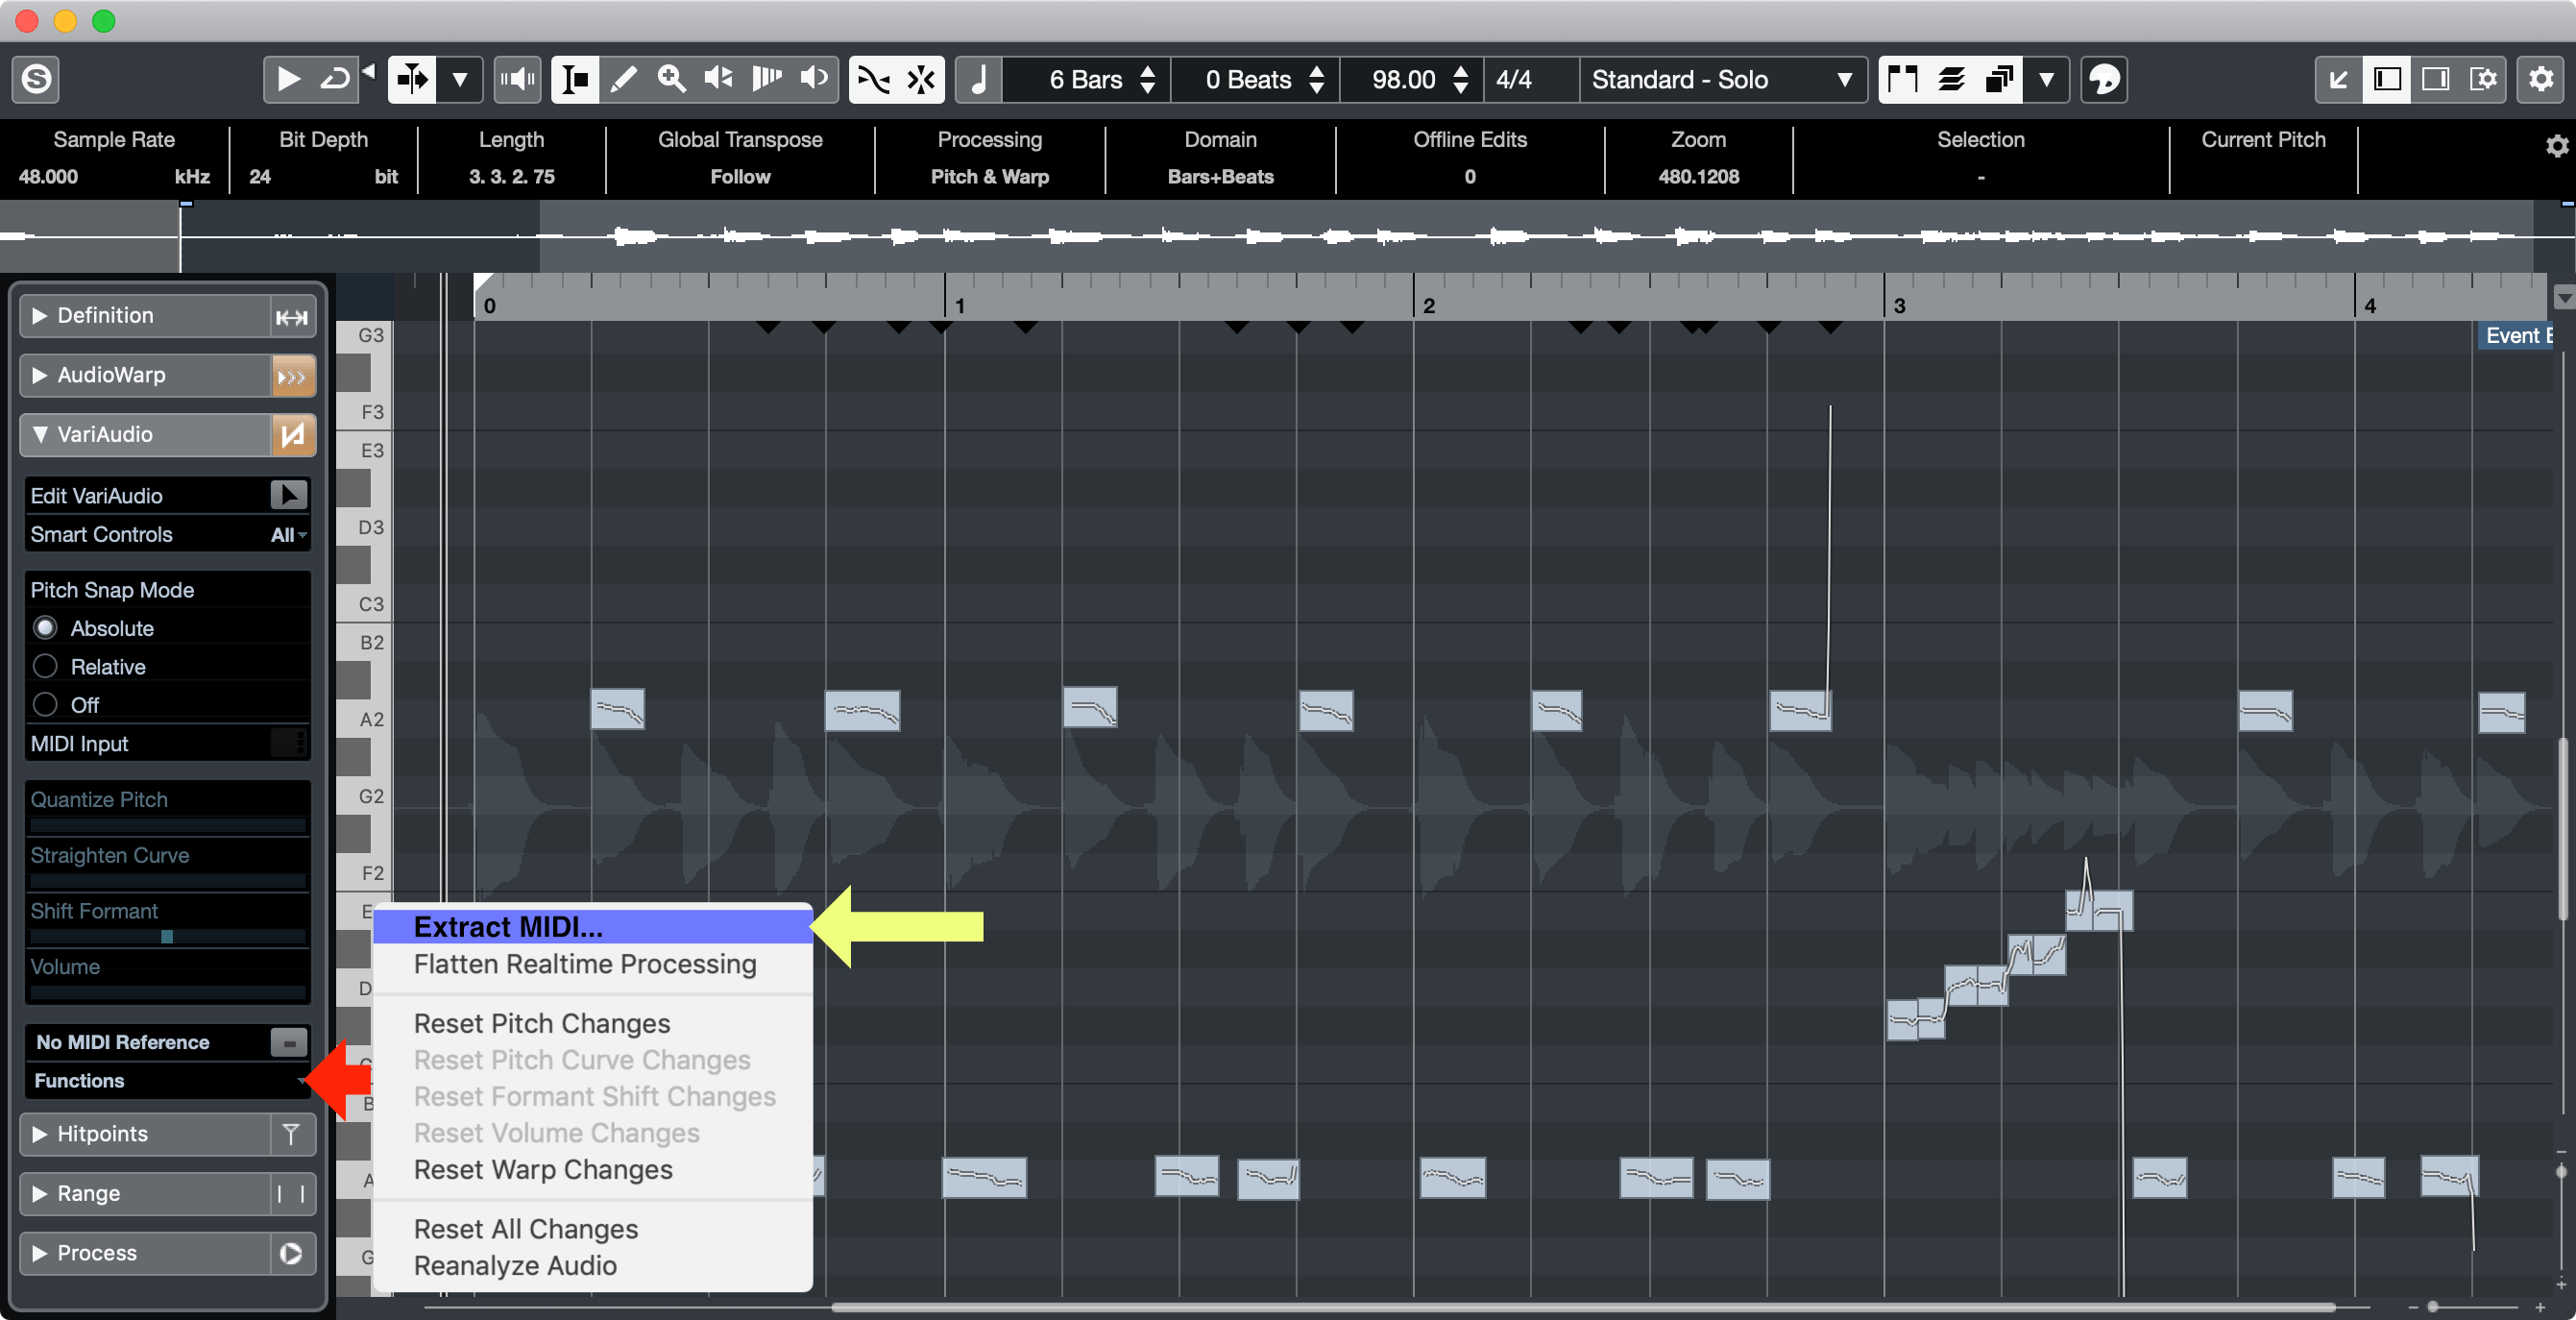
Getting your audio to MIDI is easy:
- Once your part is recorded, open the sample editor (
Audio->Sample Editor) for the clip. - Open the Variaudio menu to the left
- Optionally edit your Variaudio - Some things are easier before you get to the MIDI stage, such as glueing and cutting segments.
- Click the "Functions" text on the left and select
Extract MIDI. - Set the first
Pitch Extraction ModetoJust Notes and No Pitchbend Data. The rest is up to you.
Get that MIDI clip fed to a drum sound making device and optionally edit your pitches if necessary.
This may seem like too much work, but if you're even mildly proficient on an instrument this can save you hours of time trying to perfectly input MIDI that corresponds to a part that you can easily hammer out on your instrument.
Tips
There's 3 things that are easier to do in the Variaudio stage than in the MIDI stage:
- Glue - Sometimes the detection isn't fantastic and it will detect two notes where there's one.
- To glue two incongruous segments together, shift-left-click the bottom of the note.
- Split - The reverse of above. Sometimes two notes are played, but only one is detected.
- Left-click the bottom of the note to split a segment.
- Warp - Playing things in time is hard. Aligning things perfectly to the grid is gross. Adjusting note onsets with MIDI isn't difficult, but if you adjust with Variaudio then your pitched performance will line up with the extracted MIDI. That makes it more pleasant to listen to on playback.
- Warp by left-dragging the node on the left side of the pitch segment.
Quantizing Variaudio is possible using the Quantize Panel (Edit->Quantize Panel) and making sure Audiowarp is selected.
Conclusion
Sometimes the tradeoff of indulging in this multi-step workflow is worth it. If you can play your part out on a piano, pad or electronic drumkit then it's probably not worth it.
Instrumentalists that struggle with getting their drum parts down as they hear it in their head may appreciate the workflow. It may also aid you in transcribing rhythms as you learn what various patterns and phrases look like after they "exit your head".
Anything that can product consistent pitched noise can be used, including your voice. Most folks can get close to vocalizing their rhythmic ideas, so that should be more than sufficient if you aren't awesome enough at your main axe.
Meta
This post took 8 hours to research, text, write and edit. The video took 7 hours.
If you appreciate the information presented then please consider joining Patreon or donating money/time.
