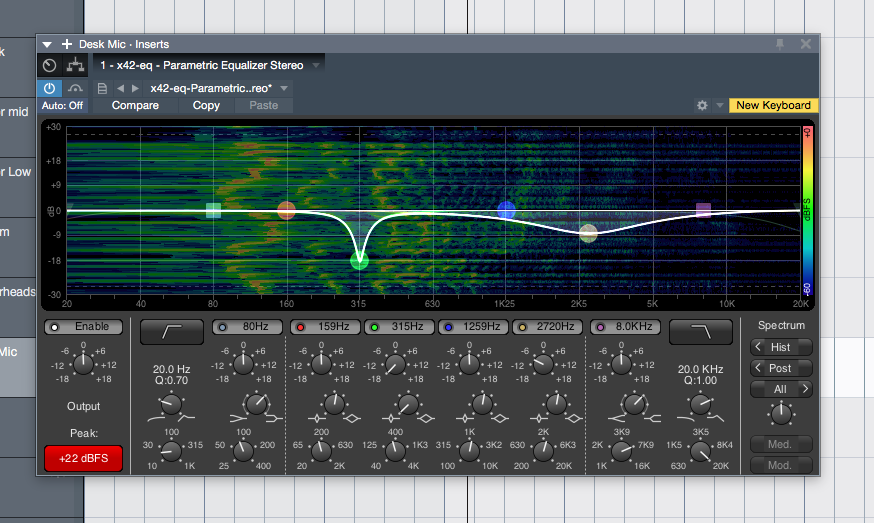
There's some awesome LV2 plugins out there for Macs, like the X42 plugins. Not everyone uses an LV2 host on macOS, but many people do use VST hosts. Even though mac-compatible LV2s, especially with GUIs, are rare, it's likely that increased user interest will generate increased developer support.
If you end up using an LV2 and enjoy it, please contact the developer and let them know that you appreciate their work!
So here's a short tutorial on how to use lv2vst to wrap your LV2 plugins to VST!
First will be a run-down for moderately experienced users/developers. Then I'm going to assume that you are on 10.11+ and have a bare-bones installation and know basically nothing.
This is written in my typical style rather than in a documentation format. This is not documentation. This is a how-to. If you have any questions, please post them in the comments.
Contents
- For developers
- For newbies - Prerequisites
- Method one - Easy mode
- Method two - Hard mode
- Conclusion
- Support Me!
For developers
If you're a developer or familiar with building software yourself then simple go to lv2vst and clone.
Now you have 2 choices...
System wide
To have the lv2vst wrap all your lv2 plugins on your system already then simply run make osxbundle then mv lv2.vst /Library/Audio/Plug-ins/VST. or you can create a symbolic link with ln -s lv2.vst /Library/Audio/Plug-ins/VST/lv2.vst
lv2.vst will wrap your plugins that are located in the following directories:
- ~/.lv2
- ~/Library/Audio/Plug-Ins/LV2
- /Library/Audio/Plug-Ins/LV2
If these directories change, the information is located in 'include/lilv_config.h' as # define LILV_DEFAULT_LV2_PATH .
Bundles
Bundling an lv2 allows you to create a single '.vst' that contains one or more lv2s as a single package. This is a slightly more involved process, but it's rather simple to do manually. Feel free to write a script if you wish.
There are 4 parts to the process:
Create the whitelist
Create a file named whitelist
plugin.lv2 will be a directory. Inside the directory will be a file called 'manifest.ttl`. Open this file.
Inside 'manifest.ttl' you need to search for the string "a lv2:Plugin". The string before that is your URI.
- If the URI is already in < > then that is the URI. Like this: <http://calf.sourceforge.net/plugins/VintageDelay>
- If it looks like plugin:word, then you need to search for "@prefix plugin:". Take the string in < >, then add the 'word' from before.
- So if I see:
fil4:monothen I search for "@prefix fil4:" - I find the line
@prefix fil4: <http://gareus.org/oss/lv2/fil4#> . - Take the URI and combine it with the word after the colon. This makes our URI as
http://gareus.org/oss/lv2/fil4#mono
- So if I see:
Create a new file named whitelist.
Place your list of URIs, one per line, inside quotes and comma separated. The final line is "NULL". An example:
"http://gareus.org/oss/lv2/fil4#mono",
"http://gareus.org/oss/lv2/fil4#stereo",
NULL
NOTE You may wish to simply investigate using lv2ls to get lv2 URIs more reliably. You can learn more in the lv2 documentation about the manifest format.
Create the bundles
Bundles are easy. Create a file named bundles. Each line is the name of the lv2 with a relative directory, inside quotes, comma separated, and the final line is "NULL". Here is an example:
"../LV2/fil4.lv2",
NULL
This is the directory relative to lv2.vst/Contents/MacOS/ where your .lv2 is located. In this example we are putting the .lv2 in lv2.vst/Contents/LV2
Make
run make osxbundle BUNDLES=bundles WHITELIST=whitelist
This will create an lv2.vst in the directory.
Copy the lv2s
Now you need to create a directory with mkdir lv2.vst/Contents/LV2.
Copy your plugin.lv2 to 'lv2.vst/Contents/LV2'.
Now you may rename your lv2.vst and copy it to your VST folder with cp lv2.vst /Library/Audio/Plug-Ins/VST.
Open your VST host and it should work! If it doesn't then drop me a comment. I've tried this on 3 separate machines with a variety of lv2 plugins, and it's fairly foolproof.
For newbies - Prerequisites
There are 2 ways I'm going to explain how to use lv2vst. Both of these require some prerequisite software installed.
If you run in to any issues, please try to google first! Some things can be easily fixed by googling the error message.
Install Command Line Tools
Open Terminal.app (it's in /Applications/Utilities/Terminal.app).
Type "gcc" then hit enter.
A prompt will show up asking you if you want to install the tools. Install it.
Confirm installation
Type make. You should receive an error: make: *** No targets specified and no makefile found. Stop.
Great.
If it says -bash: make: command not found, then you need to install the command line tools. Perhaps google will help you out here, it's not not that difficult.
Update Ruby?
Type ruby -v in Terminal.app. If the result is 2.0.0 or anything lower than 2.3.0, then you need to update Ruby.
Type the following in Terminal.app
\curl -sSL https://get.rvm.io | bash -s stablervm install ruby-2.4.2
Type ruby -v again and make sure you are on version 2.4.2. If you are not, then get googling!
Install homebrew
Now we need to install homebrew, which is a program that lets us install programs easily.
Inside Terminal.app, type /usr/bin/ruby -e "$(curl -fsSL https://raw.githubusercontent.com/Homebrew/install/master/install)".
Press enter and let it do its thing.
Install git
This is why we've installed homebrew. In Terminal.app simply type brew install git.
When it's done, typing git should give you a bunch of nonsense (that's all git ever does anyway).
Method one - Easy mode
This is the simplest way to get things working.
The homebrew method.
In your terminal.app type brew tap david0/homebrew-audio. This allows homebrew to build the applications at https://github.com/david0/homebrew-audio.
Now you can build lv2vst with brew install lv2vst.
When this has finished, type brew list lv2vst. You should see something like this: /usr/local/Cellar/lv2vst/HEAD-a9a0c3d/lib/vst/ (3 files)
Now take that directory and run the command ln -s [directory]/lv2.vst /Library/Audio/Plug-ins/VST/lv2.vst. Replace the [directory] with the directory from your list command. So my command would look like ln -s /usr/local/Cellar/lv2vst/HEAD-a9a0c3d/lib/vst/lv2.vst /Library/Audio/Plug-ins/VST/lv2.vst.
The previous command creates what is called a 'symbolic link'. This creates a link (that looks like a file or directory) that simply points to another location on your disk.
Now you're done! Any lv2 plugins that you install in the following directories should be scanned and wrapped:
- ~/.lv2
- ~/Library/Audio/Plug-Ins/LV2
- /Library/Audio/Plug-Ins/LV2
Installing LV2s with homebrew
Homebrew also allows you to install some mac LV2 plugins. Check out here for more lv2s that you can install.
An example would be to try brew install mverb-lv2.
You may need to move, copy or symbolic link your lv2 to one of the following directories:
- ~/.lv2
- ~/Library/Audio/Plug-Ins/LV2
- /Library/Audio/Plug-Ins/LV2
To find out where brew installed the plugin you just built, you would type brew list mverb-lv2. Follow the directions in the previous section for information on how to move, or symbolic link the file to the appropriate directory.
Moving mverb2-lv2 may look like this: mkdir /Library/Audio/Plug-ins/LV2 followed by mv /usr/local/Cellar/mverb-lv2/HEAD-98b3a5f/lib/lv2/jg_mverb.lv2 /Library/Audio/Plug-ins/LV2.
Take note! The plugin's name is jg_mverb.lv2 in this case. First I typed cd /usr/local/Cellar/mverb-lv2/HEAD-98b3a5f/lib/lv2/, then ls to see what the name of the .lv2 file was before I tried to copy it.
Method two - Hard mode
This is pretty much just as foolproof, but different.
Create a new directory somewhere you want with mkdir [directory] with location being the name of a directory. So for example I may do mkdir ~/Programming/lv2vst. The ~ represents your home directory.
Now you need to get to that directory. Type cd [directory] with [directory] being the directory you created. I would type cd ~/Programming/lv2vst. Now anything that we do will occur in that directory.
We need to get the lv2vst source files on our computer. This is easily done by typing git clone https://github.com/x42/lv2vst.
Time to build! Simply type make osxbundle, and begin a prayer to your preferred god. If there's no errors (warnings are OK) then we can move on. If there is an error, then get googling or leave me a comment.
If you successfully created lv2.vst (type ls to see), then all that's left is to move it to your plugins director. You can either type mv lv2.vst /Library/Audio/Plug-ins/VST to move it, or you can create a symbolic link with ln -s lv2.vst /Library/Audio/Plug-ins/VST/lv2.vst. A symbolic link creates a link (that looks like a file or directory) that simply points to another location on your disk.
Conclusion
I'm almost 100% certain I made an error or two here. If you have any trouble please let me know so that I can fix it.
Currently there aren't too many mac-compatible LV2 plugins. The awesome x42 plugins alone are worth the effort though! Currently not all of them work, but with more interested mac users the super helpful and patient developer may be inclined to further support the mac lv2 platform.
Support Me!
This post took 9 hours to research, test, write and edit. Robin Gareus was extremely helpful during this time in helping tracking down a bug in lv2vst as well as helping me understand how to operate it. If you appreciate the information presented then please donate or drop a line to Robin to let him know that you appreciate his work!
If you appreciate the information presented then please consider joining Patreon or donating money/time.
