Alright, here we go. This is some fun stuff. Modulation in FLStudio.
What I mean by modulation is automatically changing parameters without link to automation. Such as having a waveform modulate a parameter, or some envelope or other means.
This is a place where FLStudio really shines, and it seems like one of those places that few FL users even venture. They should!
It’s equally as awesome as Bitwig’s modulators, but for different reasons.
Onwards!
Other posts in this series:
- Part 0: Introduction to this series
- Part 1: Introduction to FL
- Part 2: Recording and Editing Audio
- Part 3: Piano Roll basics
- Part 4: Advanced Piano Roll
- Part 5: Piano Roll Tools
- Part 6: MIDI Controllers
- Part 7: Modulation
- Part 8: Performance mode and Video FX
- Part 9: Workflow
- Part 10: Effects Review
- Part 11: Instruments Review
- Part 12: Conclusion
Contents
How does modulation work?
This is one of the beautiful aspects of modulation in FL: how simple it is to setup.
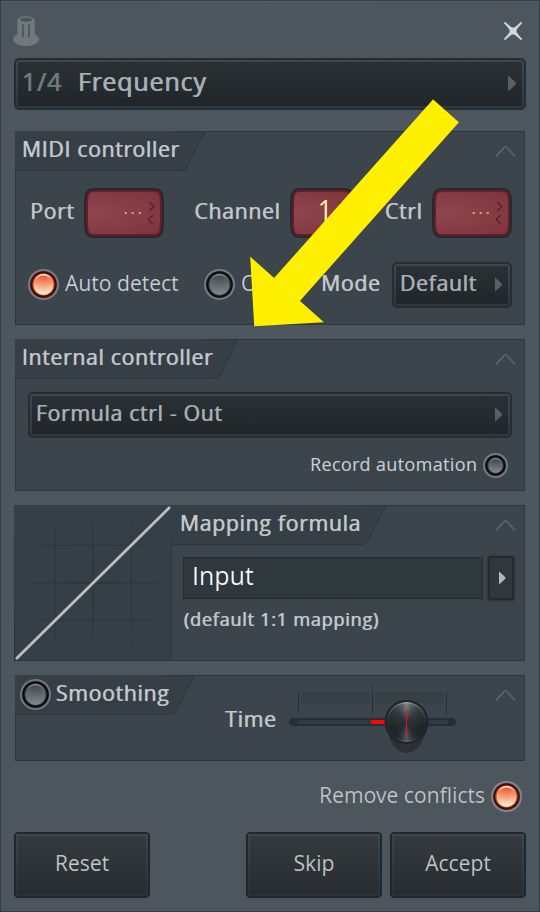
First check out the previous post. You use the exact same processes to link modulators, except instead of linking a MIDI controller you link what’s called an “Internal Controller”
When you have an internal controller somewhere in your project, then the Internal Controller section will show up in your linking dialog.
Now you can link that modulation source to your controller, along with smoothing and excellent mapping formulas
Modulation Sources
FLStudio has a slim number of modulation sources, which are called “Controllers”. Despite the relative few of them, they are extremely powerful.
Formula Controller
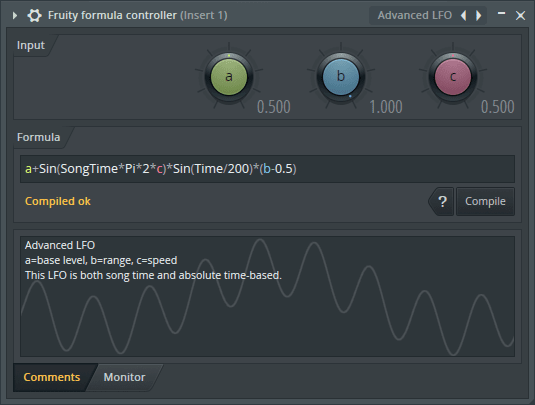
Formula controller is an effect. It doesn’t pass MIDI or Audio, but instead it allows you to use a mathematical formula to blend 3 input sources (A, B and C) or use time to create a modulation output.
This is one place you could get a modulation source like a sine wave (a+Sin(SongTime*Pi*2*c)*(b-0.5)) or square (a+Round(Frac(SongTime/(5-c*4.5)))*(b*2-1)-b+0.5), but there’s so much more!
A, B and C inputs can be used like normal knobs, however they are also modulation targets like anything else. Thusly they can be used to combine modulation sources, or you can use them as parameters in your formula and modulate those parameters.
Let’s check out an example below.
I have 3 Peak Controllers in LFO mode here. They go to A, B and C with a formula of a*b+c.
A*B causes the two sines to combine in the matter seen below, turning on the square wave offsets that modulation as the square progresses through its cycle.
I tried to choose something easy to see with multiple modulation sources interacting, but you can do far more complex things here.
Formula Controller has a whole suite of programmatic capabilities including conditionals, a complete set of math functions, metadata (song position, time), mouse position, and seeded randomization.
Remember as well that this is controllable via hardware as well. So if you want to adjust the output of your controller (assuming mapping formulas won’t do it), or combine it with something or “If this, then that”, you can do it.
There’s times where other controllers won’t do exactly what you want, but Formula Controller makes nearly anything possible.
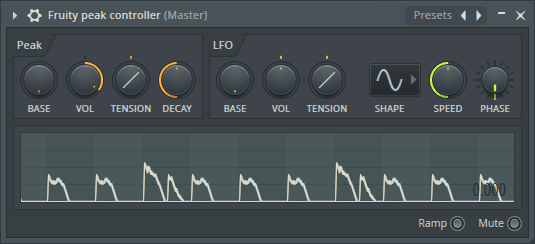
Peak Controller
Peak Controller is another effect Controller. It takes audio input, generates an envelope of that audio input based on the settings and outputs that as control data.
Peak Controller also has LFO capabilities that are simpler than Formula controller, and with more control that means… That’s right! More modulation sources. As with nearly all of the Controllers, you can modulate their parameters as well. The video above is even more easily possible.
Peak Controller outputs the LFO section and Envelope (called “Peak”) section separately, and has a “Peak+LFO” output where the peak and LFO are combined.
Probably the most common use I’ve seen of this is for sidechaining. Putting Peak Controller on a kick track, then having the “Peak” signal controller a volume knob on the bass. This makes the bass’s volume change when the kick hits. I think there’s a much better way to do this though…
I have a kick on every beat above. I also have a bassline playing.
The kick has a Peak Controller on it.
The bassline has Fruity Parametric EQ 2.
The kick’s Peak Controller is linked to the low-mid band of PEQ2. The mapping formula is inverted. I then adjusted the settings so that when the kick hits, the low-mid band on the bass’s EQ reacts and makes room for the kick.
This setup gives you a much thicker sound than turning the volume down on the whole bass track when the kick hits. You can selectively duck certain frequencies where the kick/bass fight each other, and allow both instruments to have the fullest sound possible.
This is just one of many possibilities with FLStudio’s Internal Controllers, if you spend some time fooling around you can come up with many, many more.
XY
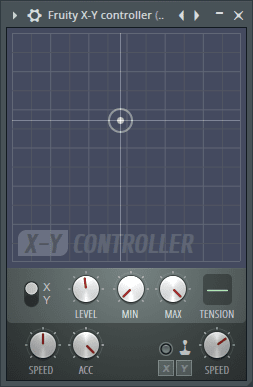
The XY controller is an XY pad. Duh.
There’s more to it than just that though, because there’s a speed and acceleration control. The movement of the X/Y position is slowed and smoothed depending on these parameters. You can use this to link other controllers to X/Y and use this as a slew rate limiter of sorts, which is really neato.
There’s joystick settings that allow you to map various joystick parameters to X and Y as you wish.
XYZ
The XY controller but with a Z… and more!
The basic premise is the same as the xy controller, except XYZ also has input mapping panels that allow you to adjust the mapping scale of each parameter.
The mapping panel has bezier curves, undo(!), grid snapping (which is weird), and a variety of tools like decimate, normalize, analyze audio, filter smooth and inversions. There’s also a sequence editor, which I’ve yet to find use for in this context, but I’m sure there’s something possible with linking a controller to it and have a single knob control the progression of a sequence.
Control Surface
Isn’t it annoying when you’re constantly having to dig through a couple windows or menus to change a parameter on a plugin? Maybe a reverb level or some compression or perhaps your mixer just won’t order your tracks exactly how you want?
Enter the control surface. You can create your own control surface using buttons, sliders, knobs, checkboxes and XY pads.
I’ve created an example above, where we have a few things happening:
- A bit crush toggle - The
Bitcrushbutton toggles the delay’s bitcrush effect on/off, except it goes from ‘no bitcrushing’ to only about 1/3 of the control. To do this I used a mapping formula of1-Input+.3. That adds 0.3 to the value, AND inverts it. - Delay and Reverb mixes - I have these sliders assigned to the dry and wet sliders on the reverb and delay. The dry slider is inverted in the mapping formula panel. This results in a ‘wet dry’ control of sorts
- Feedback and Verb Size - Knobs assigned to delay feedback and Reverb room size. Something I’ve found useful, that I did not show, is using a logarithmic mapping for the Feedback control. This makes the control knob more sensitive near the ‘max’ value, so you can really fine tune the feedback at large values. Much better than a linear mapping.
- Delay and Verb bypass - I mapped the bypass, in the mixer, to buttons. This requires an inverted mapping, but now I can turn on those effects with a single click.
All of these controls can be linked to modulators as well. They are all targets for modulation.
Creating controls in the control surface can be a pain. There’s a lot of right clicking to adjust names, styles, colours etc… For some of that you can use:
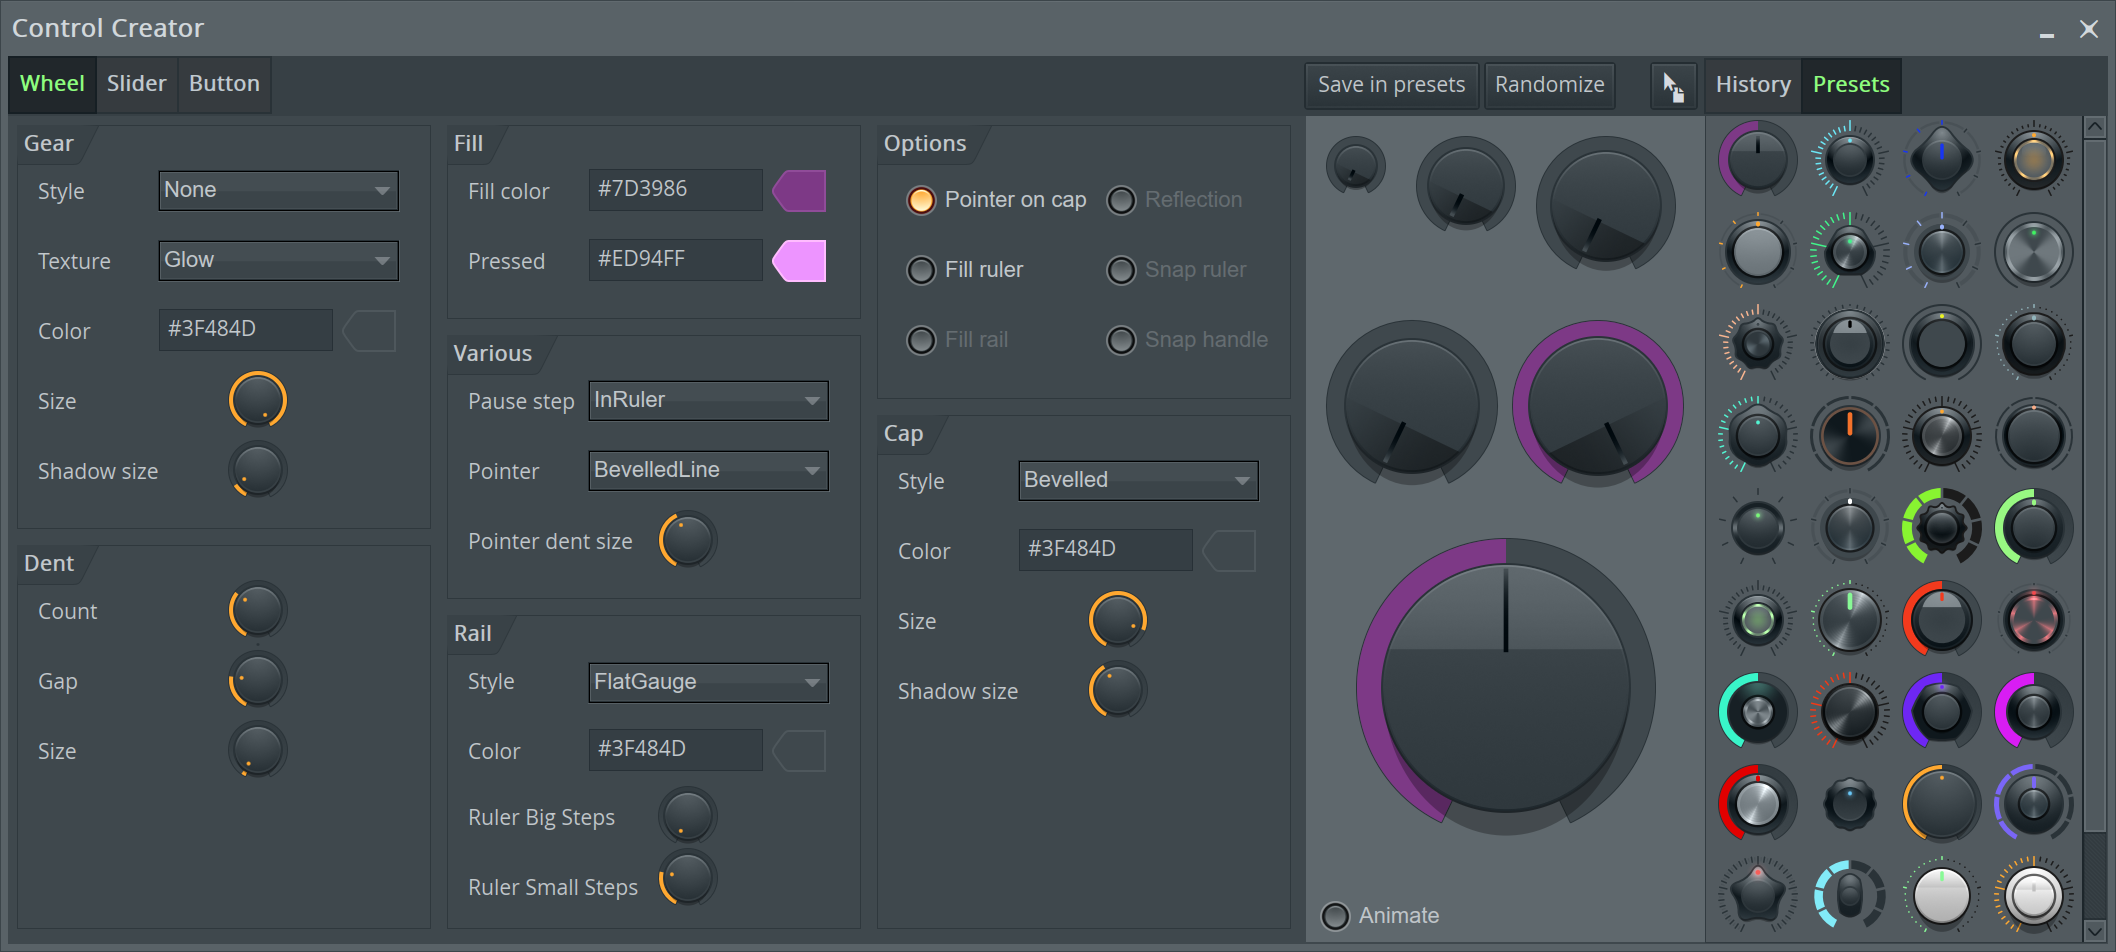
The control creator.
This is basically a separate application that lets you design controls as you want, then you can drag the pointer icon in the upper right to your Control Surface to add the control.
You can make some attractive widgets in the control creator, which makes creating your own control surfaces more fun than it out to be.
The control creator doesn’t let you rename and set captions though, which is still a pain to do. Currently (as of this writing), the control creator doesn’t work correctly in macOS either.
Envelope Controller
Envelope controller is what it says. It’s a generator (or instrument if you prefer) that responds to MIDI input. It gives you a number of envelopes: 8 articulations of the following:
- Envelope - A multi-point drawable envelope with bezier curves that’s triggered on MIDI note input. It has attack/decay/sustain/release stages with nifty scaling via the knobs at the bottom.
- LFO - this is an envelope over an LFO with a release stage. The LFO is faded in and held when the keypress happens, and releases. You control the shape of the LFO and the intensity of it over time. You can do fun things with this like a ‘spring’ effect where a key makes a parameter bounce, then the bounce fades as the key is released. (among many other things!)
- Keyboard Mapping - This allows you to map keyboard notes to modulation. In the video above (hit play), you can see that the higher I play on the keyboard, the higher the demo slider goes. So you could do something like control a filter cutoff based on which note you play on synths that don’t have keytracking. The envelope controls how much output occurs for a given note. You’re given a keyboard and you draw how much output that key gives.
- Velocity - Note velocity is mapped like the previous.
- Mod X/Y - an Modulation pad with X/Y is available with mapping.
- Random - The Y axis controls the intensity of the randomness (the distance between possible values) and the X axis is mapped to keys.
The envelope controller is exceptionally powerful, and it becomes even more powerful when used with Layers, Patcher or any setup that allows you to send the same MIDI to an instrument(s) and Envelope Controller at the same time. Now the notes used to play your instrument also create modulation.
Then again, you can sequence your modulation exactly how you want separately anyway!
Keyboard Controller
Keyboard controller works somewhat similar to the Keyboard and Velocity modes in the envelope controller. The main difference is that you can manually assign the output to keys rather than drawing on a graph.
The note value and velocity value outputs are separate, so you can grab only the note value mapping or velocity value mapping as you wish.
There’s a great “automap” mode that will linearly map the white keys or white and black keys across the keyboard, and you can set the min/max keys by resizing the lightened part on the keyboard.
Attack and Release work differently than you may expect, and I really like how they work. Attack controls how quickly the modulation moves to a higher value. Release controls how quickly it moves to a lower value. So if you wanted a sweeping cutoff, that instantly drops back down when you play a bass note, you can do it. You could also have smooth transitions to softer played parts, but instant modulation when you start hammering it out.
Mapping Formula
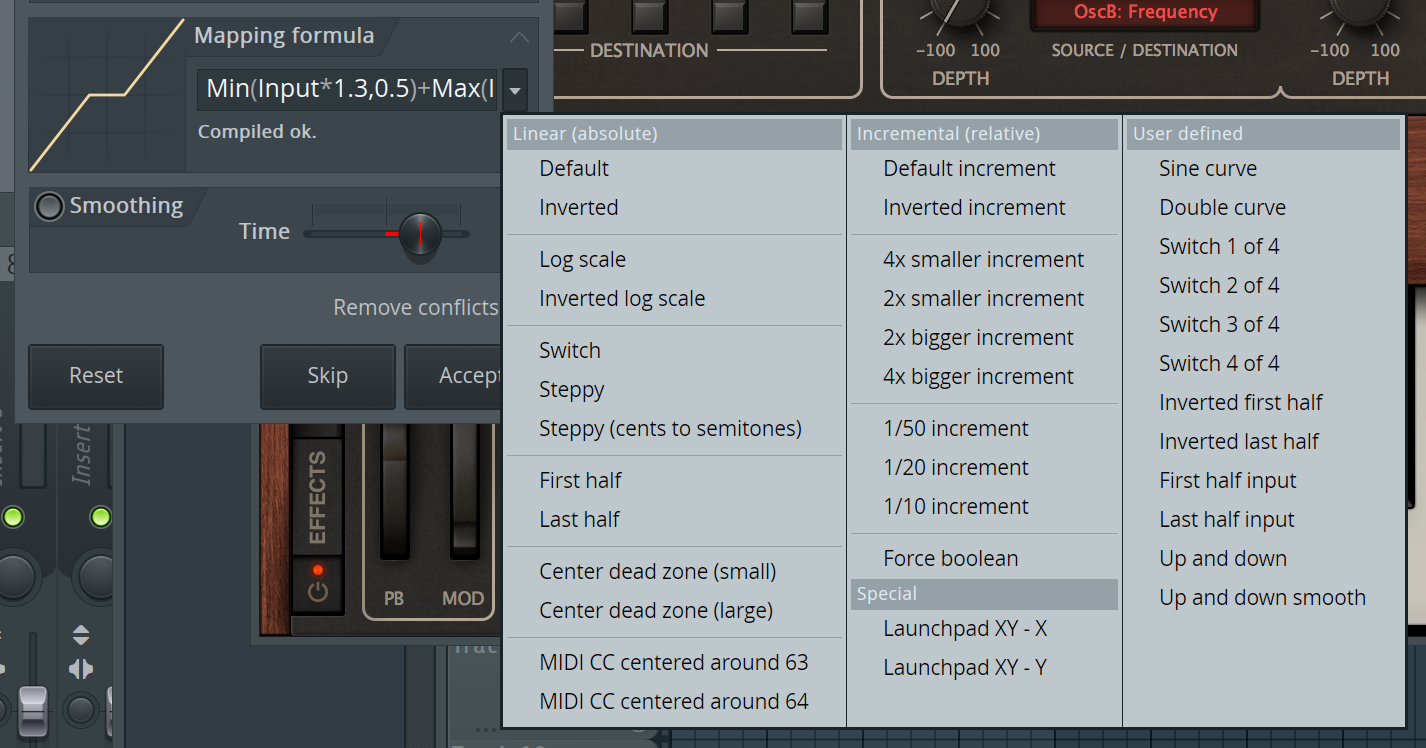
Mapping Formulas are awesome. On ANY control you assign, you can remap the input to output.
You can make it exponential, log, introduce dead zones (portions in the middle with no change), invert values, set min/max, scale things in many ways.
All the math and programmatic things available in the formula controller are here except time-based things.
If your linked controller isn’t scaled exactly how you want it, or you want it quantized, or some crazy shape… you can do it without needing to grab anything else.
ModX and ModY
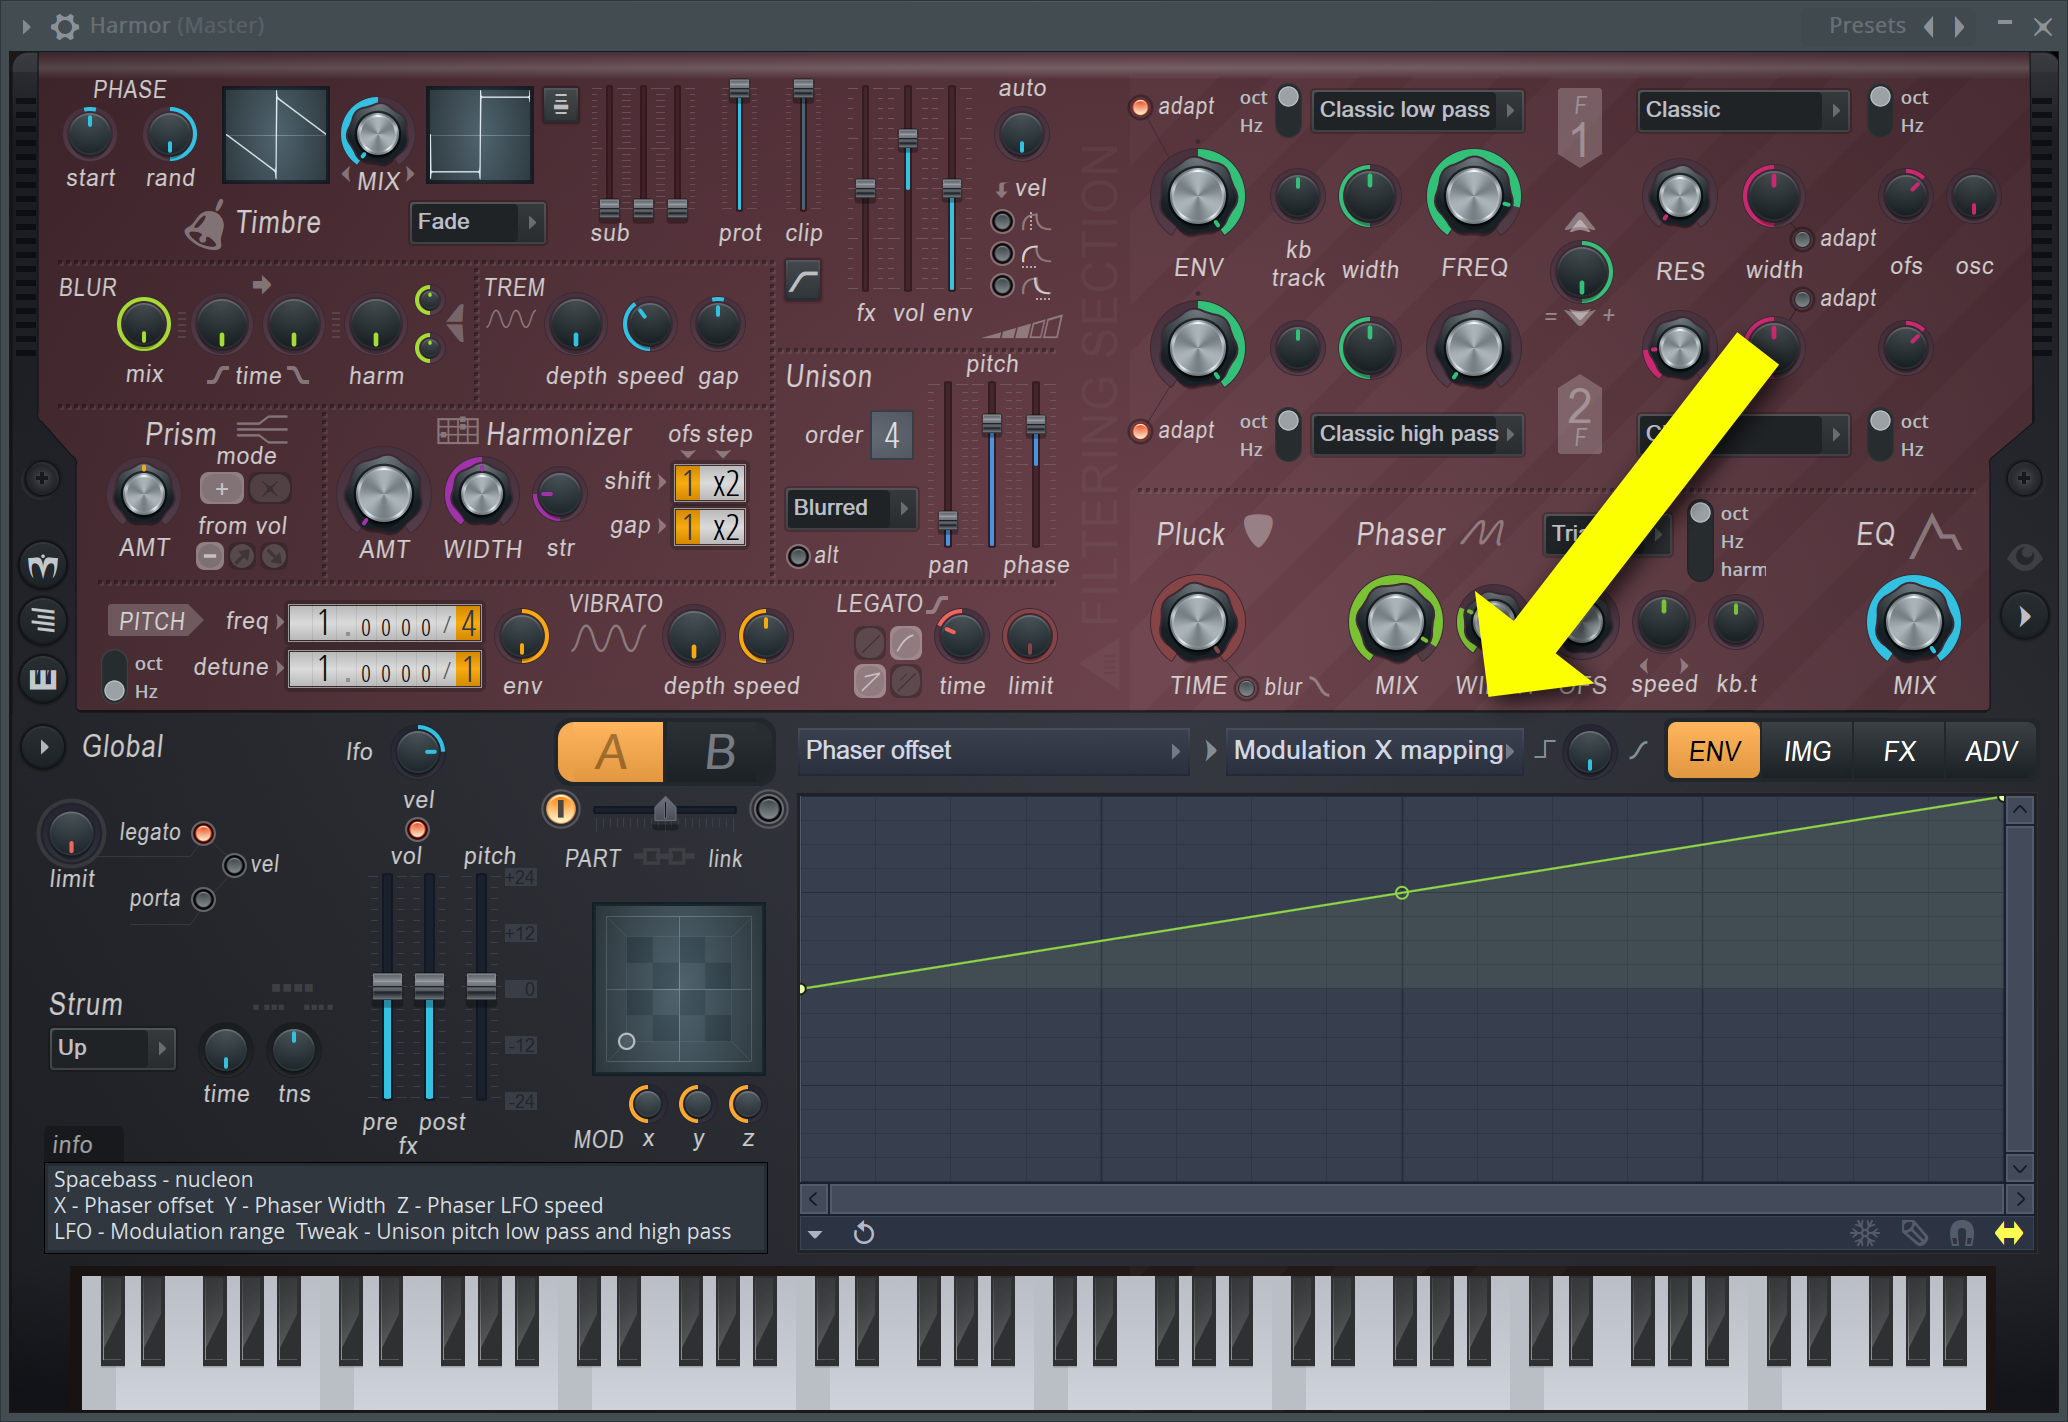
If you read the Bitwig series on modulators then you may recall that you can modulate things ‘inside’ effects. Like per-voice modulations or modulating things inside the tank of a reverb.
FLStudio doesn’t really have this, but it comes close sorta. Many native synths respond to 2 parameters called ModX and ModY, and these are assignable inside the synth.
These parameters can be mapped inside the synth to things you may not have mappable parameters for. Modulating/Linking ModX/ModY allows you to ‘reach deeper inside’ the synth to do more cool stuff.
Conclusion
Yeah. There’s some cool stuff here. There’s a small selection of extremely flexible tools that allow you to modulate nearly anything you can touch or automate, and the process for using them is simple.
Personally, I think FL has the nicest modulation system of any DAW due to how easy it is to use, and how easy it is to abuse.
Support Me!
This post took 11 hours to research, screenshot, write and edit. If you appreciate the information presented then please consider joining patreon or donating!