
Part 2 of 30 days with Tracktion Waveform 9. I'm trying to get these out every 3-4 days, but I was unable to last week so we ended up having that interview with Ben Loftis of Harrison and Mixbus.
Today I'm going to cover some really cool things, some annoyances that seem minor (but really irk me!), and the weird core of Waveform's design philosophy.
- The Good
- Modifiers
- Plugin Selector
- Plugin Thumbnails
- The Bad
- Renaming tracks
- Track Colouring
- The Weird
- Single Pane Interface
Other parts in this series:
VERSION - This review is (hopefully) accurate as of Waveform 9.1.1. Further versions may obsolete these views.
Contents
The Good
Modifiers
Waveform 9 introduced Modifiers. These are modulators, which means that they generate a signal that attaches to an automatable parameter and automatically automates it.
Waveform has 6 modifiers currently:
- LFO - LFO generates a waveform with variable offset, phase and depth. The LFO can run 'free', meaning that it's not synced to the project, or it can be locked to project transport or note-on. The signal can be unipolar (always > 0) or bipolar (-1 to +1).
- Breakpoint - 1-4 points that can be moved. Selectable as unipolar/bipolar, freerunning/transport/note sync.
- Step - A 2-64 step sequencer. Each step is assigned a value and it's played back at the selected speed.
- Envelope Follower - Maps incoming audio to a modulation signal. The signal can be low or high passed, with adjustable depth and offset. There's a gain adjustment and adjustments for the attack/hold/release of the follower (this controls how aggressively it follows those portions of the input signal.)
- Random - A randomized signal. Variable between square/triangle shapes with optional smoothing. Depth and polarity are controllable as well.
- Midi Tracker - Midi tracker takes incoming MIDI note data and maps it to a modulation signal based on the mapping graph. Velocity and pitch are selectable and these are variable between absolute and relative modes.
Adding a modifier isn't too difficult. Drag the orange knob in the upper right to a 'filter' (or plugin as most of us call it). Select the parameter and setup your modifier.
Modifiers output is assigned to other parameters by clicking the ->O (knob) button, then you can drag the knob in the right hand column of the parameter you wish to modulate. The amount of modulation is shown by a light grey outline that indicates if it's modulating by a positive or negative influence. All plugins on the track are selectable, including other modifiers. (Some of these routings, like envelope follower to its own release, will cause Waveform to crash! Oops! EDIT - This is fixed in Waveform 9.0.38 beta or higher)
A nice feature of modulators is that you don't have to select between beats and non-beats modes. It's always beats multiplied by some factor. So you end up with a full range of motion that's still relative to a musical value.
Modifiers work with plugins. Any automatable parameter can be modulated by a modifier.
Modifiers work with macro parameters as well
The modifier system is fun. It's useful. It'd be a lot better if the envelope follower more easily took audio from other tracks.
Plugin Selector
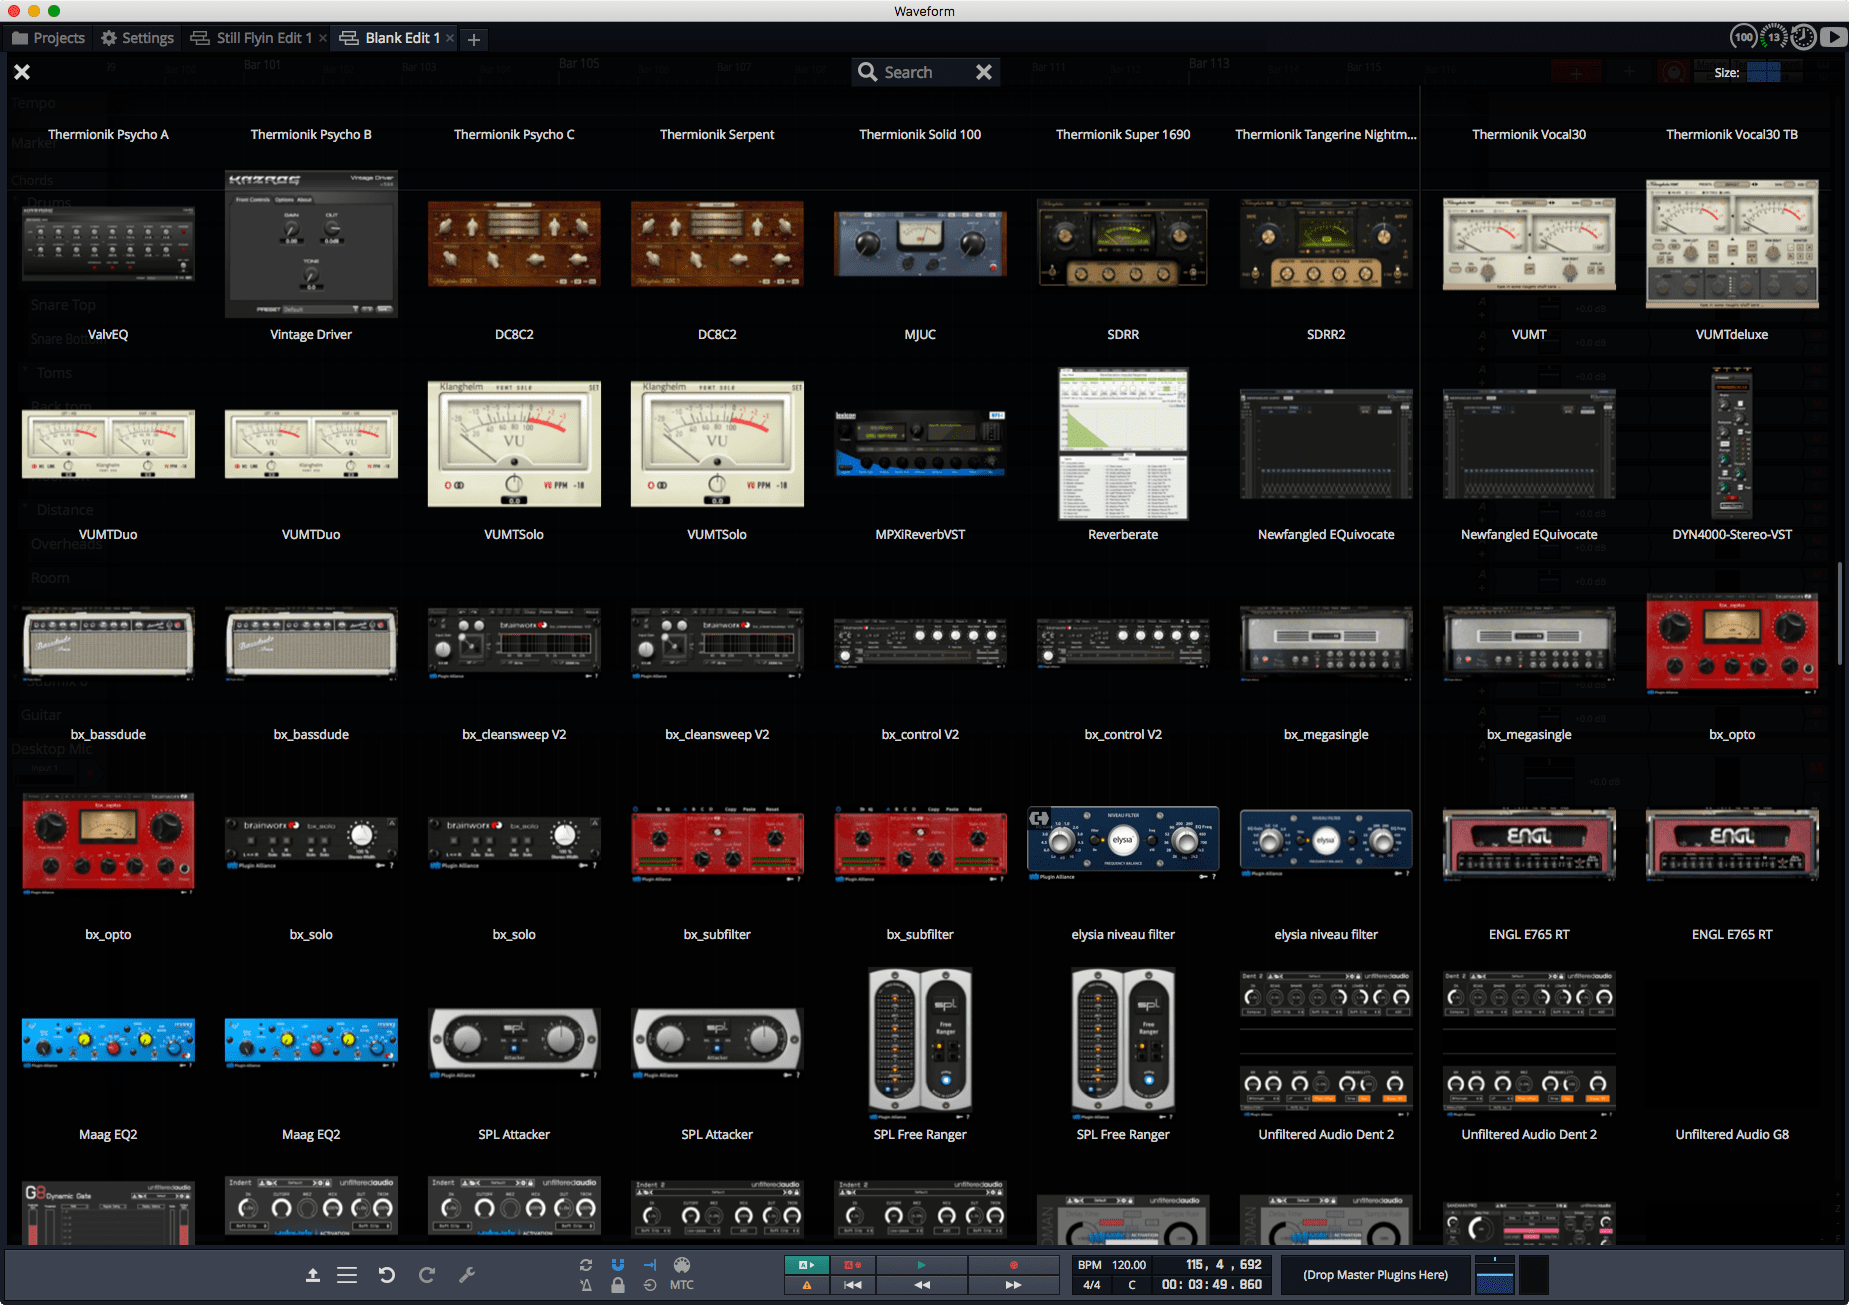
Somewhat hidden is Waveform's plugin selector window. Right click the + inside the arrow box in the upper right and you'll get a full screen plugin selector.
Plugins are shown with their native GUI if you created thumbnails for them. You can search in the search box to narrow down the list. It appears that plugin tags are not searched unfortunately, which is a big miss. It'd be nice to search for your 'compressor' tagged plugins to only show those.
To add a plugin you click and drag. The selector GUI disappears and you drag the plugin where you want it.
The plugin selector is an inspiring way to browse your plugins.
Plugin Thumbnails
To use the plugin Selector in its optimal state you need to have images of every plugin. What a drag! Or is it?
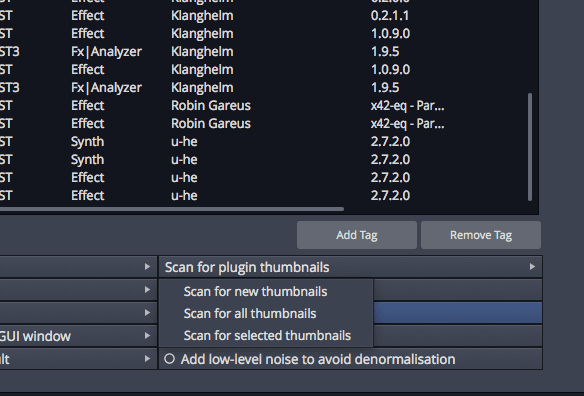
In the Settings tab under Plugins you can Scan for plugin thumbnails. This is a totally automatic process that opens each plugin and screencaptures a thumbnail of it.
This process can take a while the first time you did it. I have A LOT of plugins and it took me nearly 80 minutes the first time. Luckily Waveform allows you to only scan new plugins or scan selected plugins. When a plugin is opened, there's a camera icon in the upper right of the window title bar. So you can change the plugin's GUI and take a new screenshot without much hassle if the automatic screenshot is subpar.
Other DAWs have a similar feature, but it's usually manual and doesn't integrate as nicely as this does with the plugin selector
It seems like a small thing, but these plugin thumbnails do a great job of jogging your memory when you're trying to solve an issue and you're not 100% sure of what product will do what you need.
The bad
Renaming Tracks and importing
Renaming tracks is a bit of a pain. The default 'best' workflow is to hit tab, type the track name, alt/option-down, tab, type track name, etc...
It's a lot of hand moving around the keyboard when you have to rename 200 tracks (which I frequently do). The renaming method I outlined above only works if you have the bottom panel open too, so you may have to change your workflow depending on how you have Waveform setup. Waveform doesn't name new tracks with the imported file when you import a new file. So anything that you import to a new track requires renaming.
Other DAWs allow you to simply press tab for the next rename, or just the down arrow, or they have a special renaming functionality.
I know this is a minor nitpick to a lot of people, but to me it's a guaranteed hand cramp a couple times a week.
Track colouring
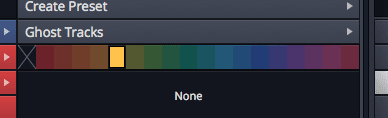
I'm big on track colours. I think that it makes it much easier to visually locate items in large projects. I like to have a selection of bright coluors, muted colours and the capability to easily create colour gradients across tracks.
Waveform doesn't really do this very well.
That image above is the colours you get to select. A handful of muted, low-contrast colours. You can select gradients for a selection of tracks either. Not only that, but there's no way to set colours for a folder so any time that you add something to a submix or a folder you have to manually colours it.
The colour system really needs an overhaul.
Modifier Nitpicks
- The rate knob doesn't respond to any sort of 'reset to default' message! Annoying.
- The Envelope Follower - This would ideally be the ultimate modifier. Anything you could make as an audio signal could be used as a modulator, but there's a big issue. Envelope follower can't specifically take in audio from another track at a specific point. It uses audio that's currently fed to it at the end of the track. If you want to have audio from one track modulate a parameter on another track from a specific point, it requires a cumbersome work around with using a rack. The envelope follower needs to be able to take in audio from other tracks, OR control parameters on other tracks easily. That would make this entire system better.
- Midi Tracker also can't select input. More cumbersome workarounds to make sure that the correct MIDI is getting to the modifier :(
- It is a bit strange that you can't simply drop a modifier on to a track without selecting a parameter, since this is possible to do when you move a modifier to a new track. Strange. (Actually, while writing this I discovered that sometimes you can... if there's been a modifier there recently. This is just inconsistent)
- Parameter search needs improvement - Searching for
Band Gainon TEqualiser offers zero results even though there'sBand 1 GainthroughBand 2 Gain. A 'fuzzy search`, even if it just substituted spaces for wild cards, would be nice. Modifiers modulating themselves is a quick way to get a crash . Goodbye Waveform. Poof. Gone. This is a useful functionality sometimes, but go ahead and save your project then have a modifier modulate its own rate. Waveform will do its best approximation of a Navy Landing. I've crashed Waveform probably a few 100 times while writing this... my curiousity got the best of me I think.EDIT - This is fixed in Waveform 9.0.38 beta. A fix for this was posted 7 days after this blog post went up.- Meta modifiers - There needs to be a way to scale, split, add, subtract, etc... modifier signals. Look at Bitwig's Math modulator. It's just a modulator that you modulate a parameter of it by other modulators. It then outputs the mathematical result of those 2 inputs. See the whole Bitwig Modulators Page for more examples.
- The Y axis of most modulators is unlabeled. Want to know what value or relative % your step is at? Too bad. Want to know what your breakpoint is doing? Tough luck.
- The random modifier has no determinate mode. There is no way to make sure that every playback is 'randomized the same' so to say. This needs to be an option of the transport sync mode. It would be nice if the user could input or create their own random seed as well.
- MIDI Assignment - You can assign MIDI CC to Modifier controls, but how do you adjust or change that?! I have no clue. I searched and I could not figure out how to adjust or delete those assignments.
The Weird
Single Pane Interface
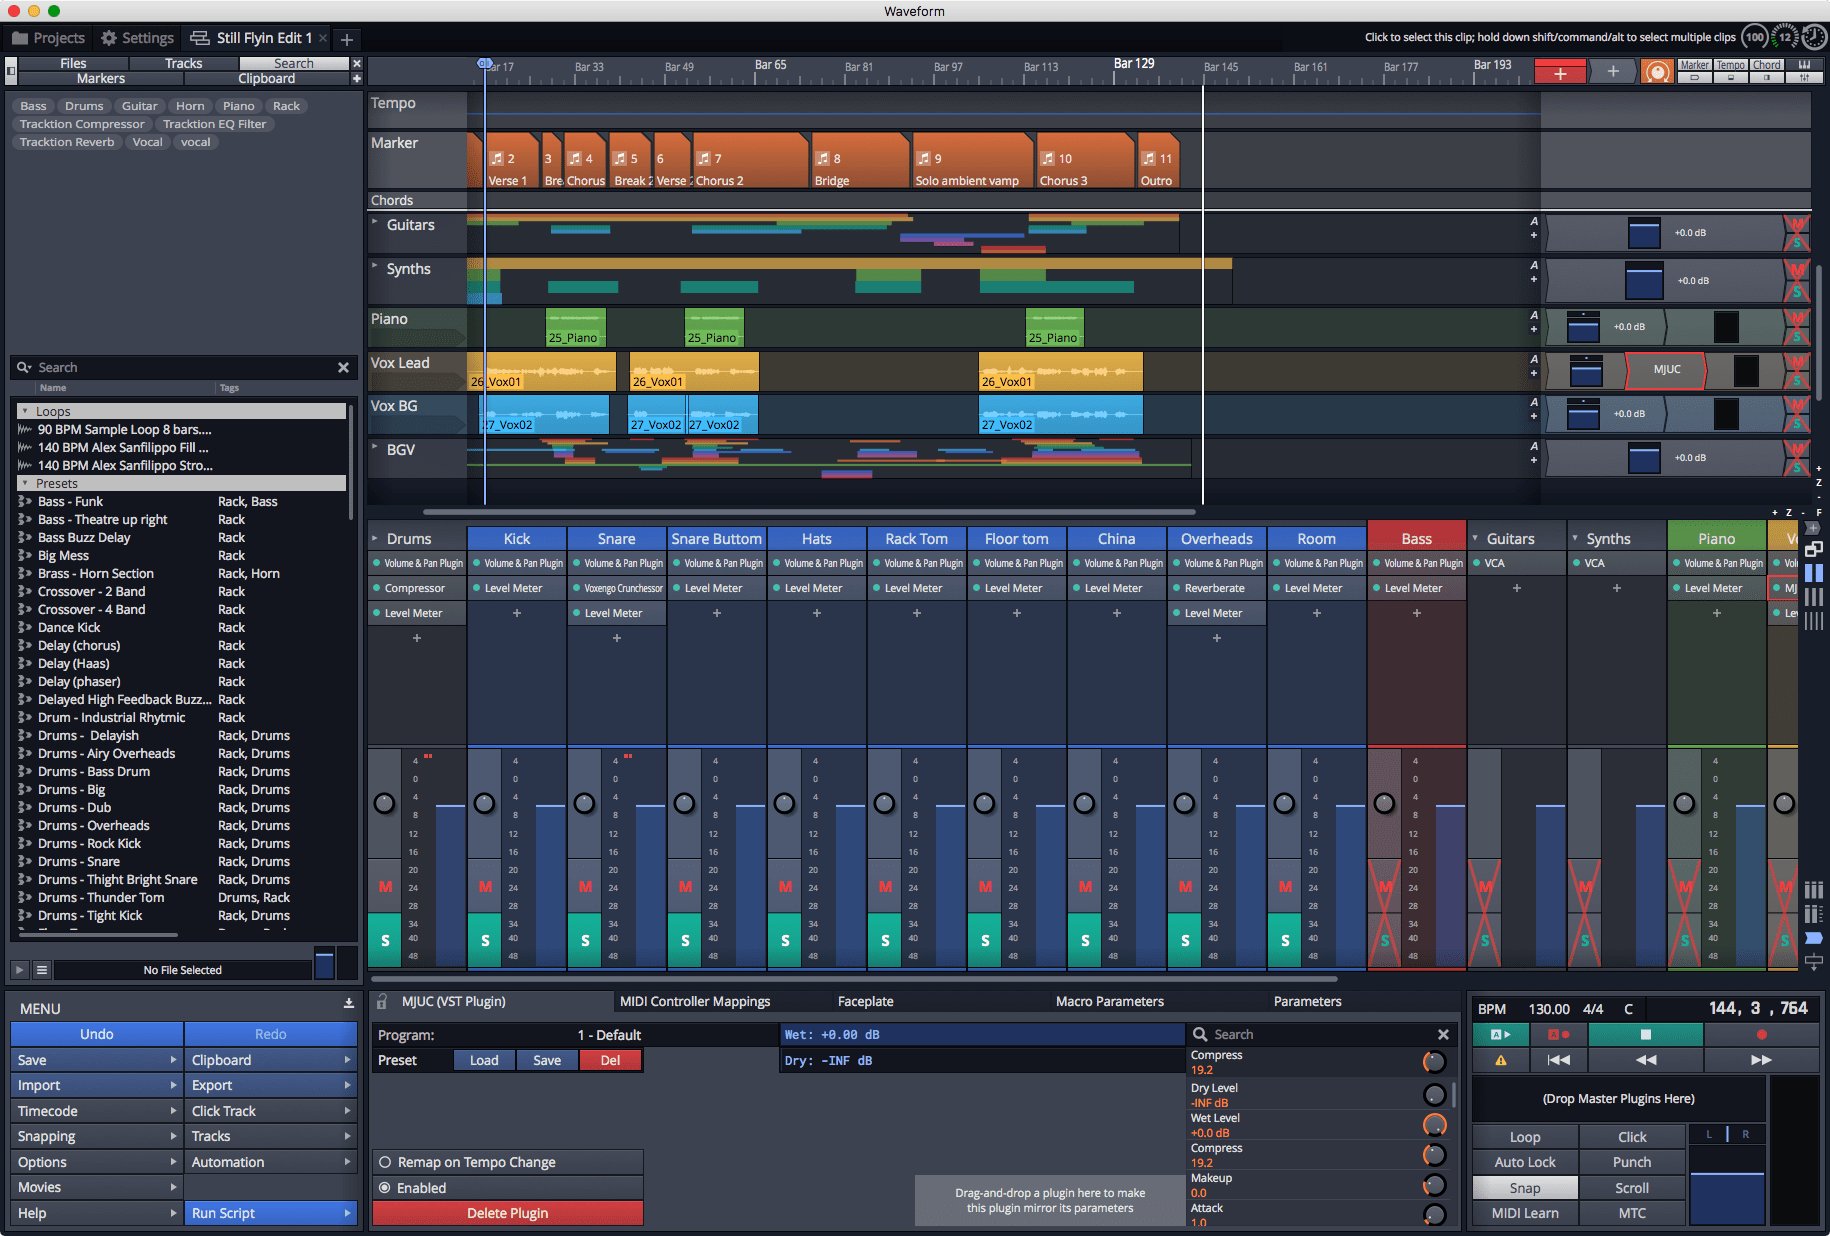
One of the main design aspects of Waveform is that basically everything is in one pane. Yes there's a Projects tab. There's a settings Tab. The mixer can go in to its own tab. The MIDI editor can spawn a new window. Plugins have their own windows.
Wait a second. That's not everything in one window?!
It really confuses me when I use Waveform sometimes. There's a lot of things on screen sometimes. It's actually nice for a good portion of your average workflow, but at times it is rather overwhelming. I don't need to see 26 (I counted) different widgets when I just want to change the colour of a MIDI item. That is a lot of clutter. I don't want to see 25 widgets when I want to add a new tag to a track. I also don't want to have to wait for a silly animation when I collapse that panel.
Adding plugins is always a click-and-drag affair, which I hate. There's really no way around it because the interface is all smushed together to make space for an entire DAW on one screen.
Some of these things go back to one of my earlier complaints as well. Ctrl-tab doesn't switch between tabs. Cmd-` (mac) and alt-tab (win) doesn't cycle between the main pane and the midi editor. Tab doesn't switch between pane focus. It's strange man, strange.
Of course I can't label this as a bad thing. It's unique and I can certainly see how this is a great GUI paradigm for certain workflows. I feel like it's becoming clear that no amount of clever-thinking is going to allow the Waveform team to continue expanding the feature set of the product all on one screen. I've been following Tracktion since V1, and Version 8 was the first time I really started to feel like the single pane is just not enough space for the functionality confined in to it.
And yeah... no other DAW really works exactly like this. It's weird.
Support Me!
This post took 9 hours to research, photograph, write and edit. If you appreciate the information presented then please consider joining patreon or donating!
Other parts in this series
- Version 9, Part 0: Intro
- Version 9.1.1, Part 1: Browser, Mixing, GUI, VCAs
- Version 9.1.1, Part 3: Macros, UI design, Ghost tracks, Buying
- Version 9.1.1, Part 4: Pattern Generator, Edit Clips, Folder editing, Chord Track
- Version 9.1.1, Part 5: Step Clips, Loops, Clip Linking, Loop Recording, Track Presets
- Version 9.1.1, Part 6: MIDI Editing
- Version 9.1.1, Part 7: Recording
- Version 9.1.1, Part 8: Clip Layer FX, Multisampler, Scripting, Project Management and more
- Version 9.1.1, Part 9: Instruments and Effect Review
- Version 9.1.1, Part 10: Conclusion
- Version 10.1.0
If you appreciate the information presented then please consider joining Patreon or donating money/time.
